
2018.2.2 Xilinx Linux Dev for the ZC706 on Win7 SP1 via VirtualBox 6.0.10
![]()
These instructions help you install all the components to do Linux development for the ZC706 (containing a XC7Z045 FFG900 – 2 SoC, Zynq-7000) on Windows via VirtualBox running Ubuntu 2016.04.3 using Xilinx’s 2018.2 development environment.
Overview
What You'll Download and Install
You’ll need to download over 30 GBs of data including:
-
VirtualBox 6.0.10 (30 MB)
-
ubuntu-16.04.5-desktop-amd64.iso (1.47 G)
-
VirtualBox Extension Pack for 6.0.10 (23 MB)
-
Vivado 2018.2 (includes SDK) (17.10 GB)
-
Vivado 2018.2.2 Update (5.88 GB)
-
PetaLinux 2018.2 (6.14 GB)
-
ZC706 BSP for PetaLinux 2018.2 (106 MB)
Note: sizes are rounded
You will Need a Vivado License
The ZC706 utilizes a XC7Z045 FFG900 – 2 SoC Zynq-7000. This part is not included in the free Vivado Design Suite WebPACK™ tool (see [link] for the supported architectures). The ZC706 includs a Zynq-7000 AP SoC ZC706 Evaluation Kit, Device Locked, Node Locked license good for 1 year.
This also means that during installation you will select the Vivado HL Design Edition (see [link] for the differences).
Steps
Download Ubuntu, PetaLinux, Vivado & SDK, and ZC706
Note: You must login to Xilinx to use some of these links.
Step 1: Create C:\downloads
Step 2: Download 64-bit Ubuntu 16.04.5 from [link] to C:\downloads
Step 3: Download PetaLinux Tools 2018.2 from [link] (login required) to C:\downloads
Step 4: Download ZC706 PetaLinux Tools BSP from [link] (login required) to C:\downloads
Step 5: Download 2018.2 Vivado & SDK full install from [link] (login required) to C:\downloads
Step 6: Download 2018.2.2 update from [link] to C:\downloads
Download and Install VirtualBox and the VirtualBox Extension Pack on Win 7
Note: These steps will work if you’re installing or upgrading.
Step 1: Download VirtualBox 6.0.10 from [link] (30 MB) and install it to C:\Program Files\Oracle\VirtualBox\
Note: During installation, on the Customer Setup page, click on the drop-down box next to VirtualBox Application and select Entire feature will be installed on local hard drive
Note 2: “Click-through the installer,” use defaults and say yes to install the extra drivers
Step 2: Download the Oracle VM VirtualBox Extension Pack for 6.0.10 from [link] (23 MB) and install it
Note: The pack contains USB 2.0 and USB 3.0 Host Controller, Host Webcam, VirtualBox RDP, PXE ROM, Disk Encryption, NVMe
Create a VM
Step 1: Open VirtualBox and select New
Step 2: Set:
A. Name to ubuntu-16.04.5-desktop-amd64-8GB-RAM-120GB-Disk
B. Leave default for Machine Folder
C. Type to Linux
D. Version to Ubuntu (64-bit)
E. Click Next
Step 3: Set Memory size to 8192 MB and click Next
Step 4: leave the Create a virtual hard disk now radio-button selected and click Create
Step 5: Leave the VDI (VirtualBox Disk Image) radio-button selected and click Next
Step 6: Leave the Dynamically allocated radio-button selected and click Next
Step 7: Set the size of the Virtual Hard Disk file to 120.00 GB and click Create
Install 16.04.5
Step 1: Select the VM you just created (ubuntu-16.04.5-desktop-amd64-8GB-RAM-120GB-Disk) in the Oracle VM VirtualBox Manager
Step 2: Click on [Optical Drive] Empty
Step 3: Select Choose disk image…
Step 4: Select the 64-bit Ubuntu 16.04.5 ISO you downloaded above to c:\downloads
Step 5: Click Start in the Oracle VM VirtualBox Manager and let Ubuntu boot to the Try Ubuntu / Install Ubuntu screen
Step 6: Click Install Ubuntu
Step 7: Check the Download updates while installing Ubuntu and Install third-party software for graphics and Wi-Fi hardware, Flash, MP3 and other media check-boxes and click Continue
Step 8: Leave the Erase disk and install Ubuntu radio-button selected and click Install Now
Step 8.1: Click continue on the Write the changes to disks? pop-up
Step 9: List where your timezone is and click Continue
Step 10: Select your keyboard and click Continue
Step 11: Enter:
A. Your name
B. Your computer’s name
C. Pick a username
D. Choose a password
E. Confirm your password
F. Leave the Log in automatically radio button unselected
G. Leave the Require my password to log in selected
H. Leave Encrypt my home folder unselected
I. Click Continue
Ubuntu will start to install
Step 12: Click Restart Now
Step 13: Press ENTER at the Please remove the installation medium, then press ENTER: screen
Ubuntu will reboot into the Log In screen
Note: as you run Ubuntu may ask if you’d like to upgrade to 18.04.2 LTS. Click Don’t Upgrade then click OK.
Install VirtualBox Guest Additions
Step 1: Install the correct Linux headers
Note: this doesn’t need to be done, it will already be done
A. Right-click in the Ubuntu guest and select Open Terminal
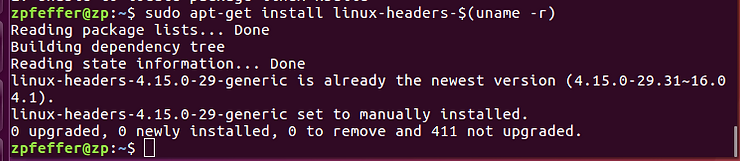
B. Type sudo apt-get install linux-headers-$(uname -r)
Note: You should see a message saying that they are already installed:
Step 2: Type sudo apt-get install build-essential kernel-package
Step 2.1: Type Y to download and install 1,345 MB
Step 3: You’ll see a Package configuration pop-up window:
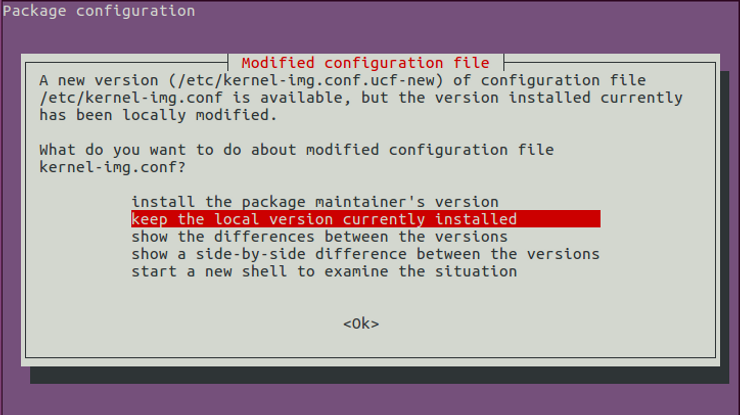
Select install the package maintainer’s version and select Ok
Step 4: Power off the virtual machine
Step 5: In the Oracle VM VirtualBox Manager select click on [Optical Drive] Empty and select Choose disk image… Select C:\Program Files\Oracle\VirtualBox\VBoxGuestAdditions.iso
Step 6: Start the virtual machine
Step 7: After it boots, right-click on the desktop and select Open Terminal
Step 8: Type cd /media/$USER/VBox_GAs_6.0.10/
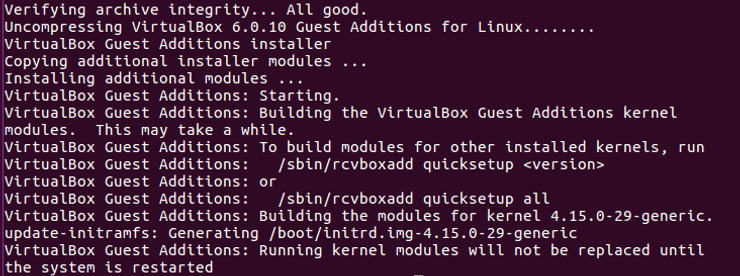
Step 9: Type sudo sh ./VBoxLinuxAdditions.run
You should see:
Step 10: Power off the virtual machine
Step 11: Click [Optical Drive] VBoxGuestAdditions.iso (73.59 MB) and select Remove disk from virtual drive
Step 12: Start the virtual machine
Step 13: Test the install by resizing the window containing the VM, you should see the desktop resize
Enable Copy/Paste
In the VirtualBox virtual machine window, click Devices > Shared Clipboard > Bidirectional
Test by opening a terminal, copying the text and pasting it into a Notepad. Then type something in Notepad copy it and paste it into the terminal.
Mount C:\downloads in the Guest
Step 1: In the VirtualBox virtual machine window, click Devices > Shared Folders > Shared Folders Settings…
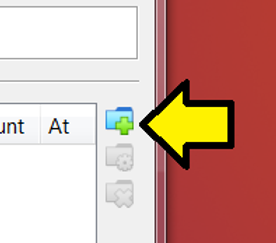
Step 2: Click the folder with the plus sign:
Step 3: Fill in the Shared Folder fields:
A. Set Folder Path to C:\downloads (The Folder Name field will auto populate)
B. Check the Auto-mount checkbox
C. Click OK (you’ll be sent back to the Shared Folder screen)
D. Click OK again on the Shared Folder
Test it by opening a terminal and typing: sudo ls /media/sf_downloads/
Note: you can now copy/paste this command into the terminal now because you’ve enabled that :)
Step 4: Change permissions so that you don’t need to sudo
Type: sudo usermod -G vboxsf -a $USER
Step 5: Log off, log in and open a terminal
Test by typing ls /media/sf_downloads
Prepare a Vivado Install Directory
Step 1: In the terminal type sudo mkdir -p /opt/Xilinx
Step 2: In the terminal type sudo chmod -R a+rwX /opt/Xilinx
Note: the steps prepare a directory that all users can read, write and execute. See [link] for what the capital X means.
Install Vivado 2018.2 on Ubuntu
Step 1: Open a terminal and type cd /media/sf_downloads
Step 2: Extract the archive
Type: tar -zxvf Xilinx_Vivado_SDK_2018.2_0614_1954.tar.gz
Step 3: Type cd Xilinx_Vivado_SDK_2018.2_0614_1954/
Step 4: Type ./xsetup
You should see:
Step 5: Click the Continue button on the “A Newer Version Is Available” pop-up
Step 6: Click Next > on the Welcome screen
Step 7: Accept the 3 agreements on the Accept License Agreements screen and click Next >
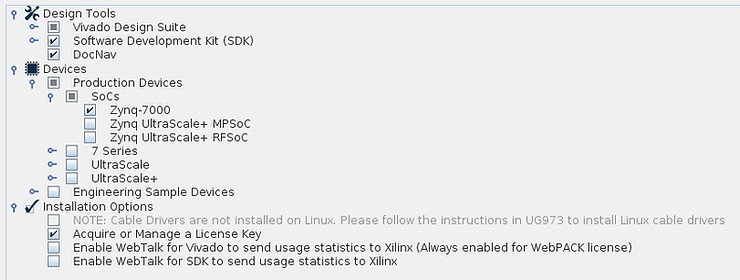
Step 8: Click the Vivado HL Design Edition radio button and click Next >
Step 9: Accept the defaults on the Vivado HL Design Edition customization page and click Next >. The default install will use cost 37.06 GB.
or to save some install space and install time…
…you can delete components you don’t need and get the install size disk needed down to 24.8 GB, a savings of over 12 GB, using the following options:
Step 10: Click Next > at the Select Destination Directory screen (will install Vivado into /opt/Xilinx)
Step 11: Click Install at the Installation Summary screen
Step 12: At the Vivado License Manager 2018.2 screen enter your license details
Step 13: Close Vivado
Install the Vivado 2018.2.2 Update
Step 1: Open a terminal and type cd /media/sf_downloads
Step 2: Extract the archive
Type: tar -zxvf Xilinx_Vivado_SDx_Update_2018.2.2_1001_1805.tar.gz
Step 3: Type cd Xilinx_Vivado_SDx_Update_2018.2.2_1001_1805/
Step 4: Type ./xsetup
You should see a Vivado splash screen followed by a Welcome screen
Step 5: Click the Next > button at the Welcome screen
Step 6: Check that the install directory is correct and click the Install button at the Update Summary screen
Step 7: Click the Continue button if you have Vivado running and see a Close Xilinx applications pop-up
Note: it took my set up (VirtualBox on Windows 7 SP1 on a ThinkPad 460 4 min)
Step 8: Click the OK button on the Update completed successfully pop-up
Configure the Virtual Machine for Vivado Cable Drivers
Step 1: If Ubuntu is running in a virtual machine, power off Ubuntu.
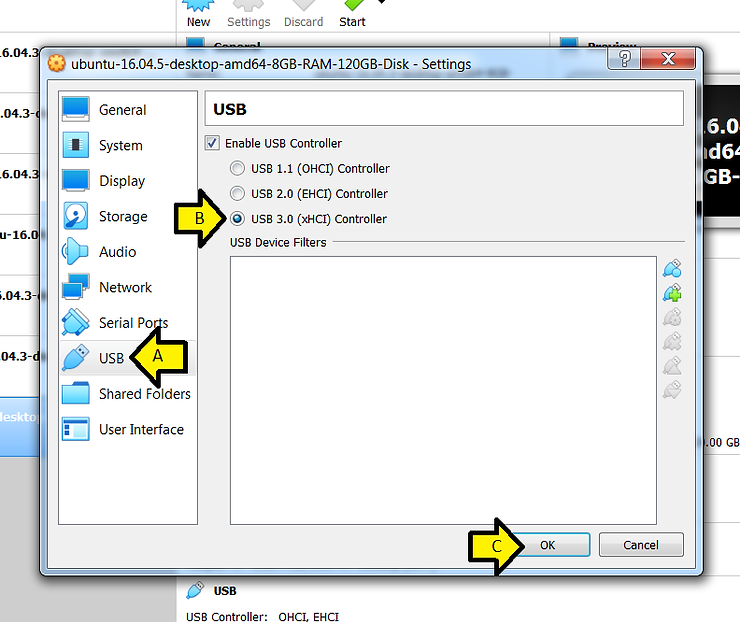
Step 2: In the VirtualBox Manager, ensure the virtual machine configuration is selected and click Settings
Step 3:
A. Click USB in the left handed frame and then
B. Click the USB 3.0 (xHCI) Controller radio button
C. Click OK
Step 4: Start the virtual machine and let Ubuntu completely boot
Install the Vivado Cable Drivers
Step 1: Open a new terminal
Step 2: Type:
cd /opt/Xilinx/Vivado/2018.2
cd ./data/xicom/cable_drivers/lin64/install_script/install_drivers
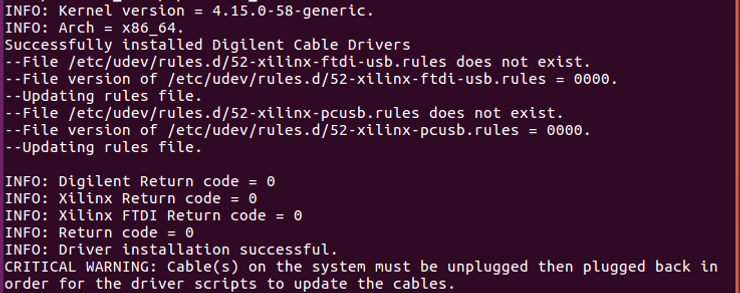
sudo ./install_drivers
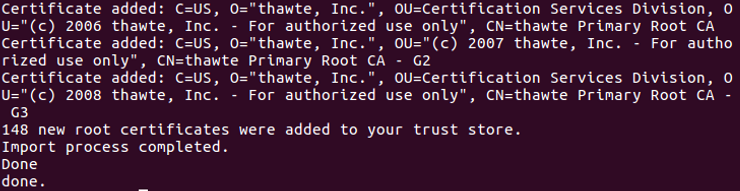
You should see:
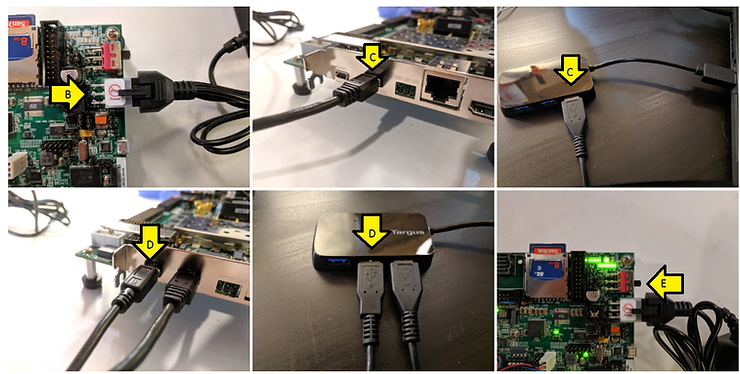
Step 3:
A. Set the ZC706 to boot from JTAG
B. Plug the power supply into the ZC706
C. Plug the the Micro-USB B connector into the JTAG-to-USB port and the USB A-Type connector into your computer or a USB hub connected to your computer
D. Plug the USB Mini-b (5-pin) connector into the USB UART port and the USB A-Type connector into your computer or a USB hub connected to your computer
E. Power on the ZC706 using the switch SW1
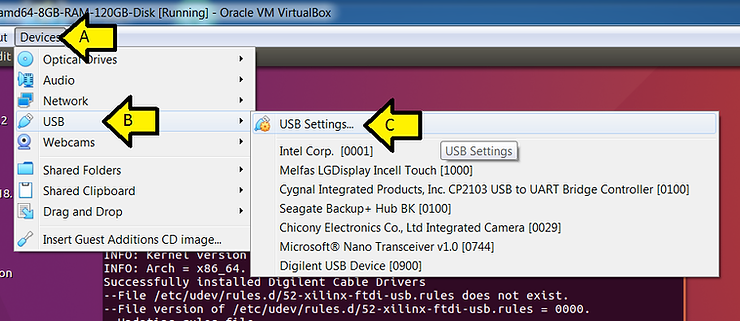
Step 4:
A. Click Devices
B. Click USB
C. Click USB Settings…
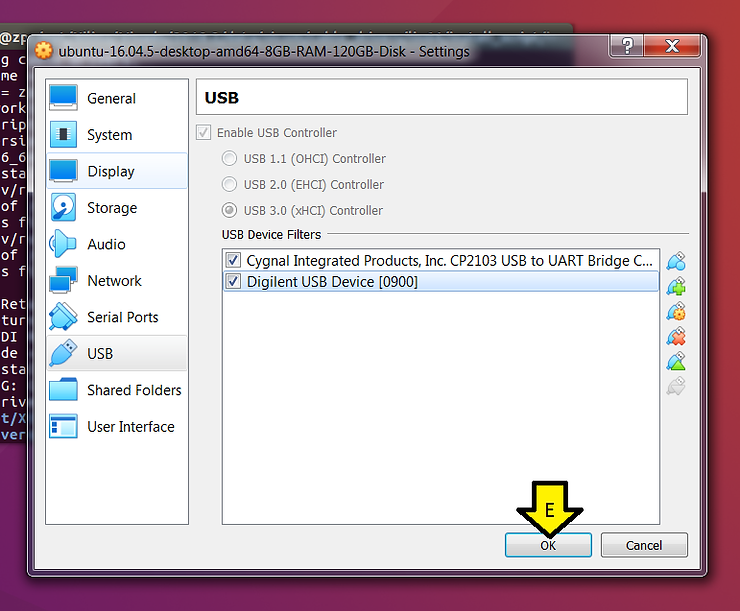
Step 5:
A. Click the USB connector+ icon
B. Click USB to UART Bridge Controller
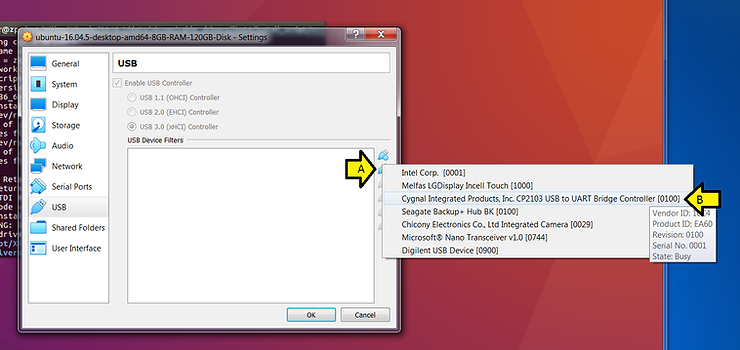
C. Click the USB connector+ icon
D. Click Digilent USB Device
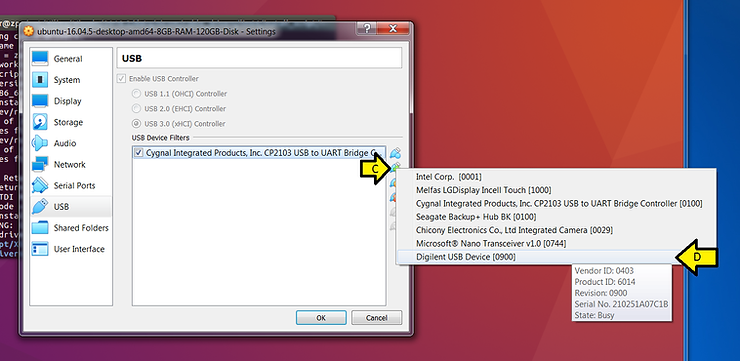
E. Click OK
Step 6: Unplug both devices
Step 7: Plug them back in and wait for a bit. If sound is enabled you will hear a tone.
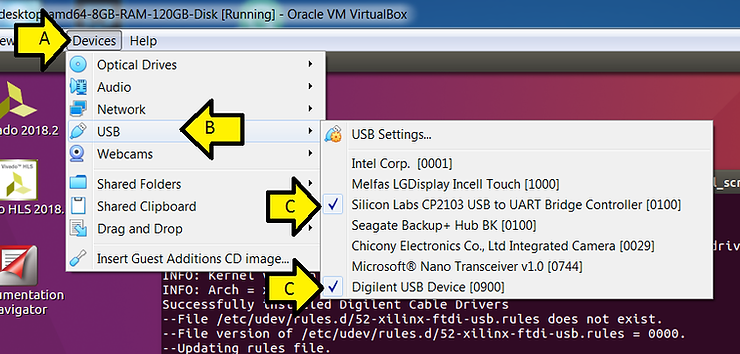
Step 8: Check that the devices are enabled in the virtual machine
A. Click Devices
B. Click USB
C. Check that the 2 devices are checked
Install PetaLinux Tools
Step 1: Open another terminal
Step 2: Run the following commands
sudo apt-get update
sudo apt-get install python3 dos2unix iproute2 gawk xvfb git make net-tools libncurses5-dev tftpd lib32z1 libssl-dev flex bison libselinux1 gnupg wget diffstat chrpath socat xterm autoconf libtool tar unzip texinfo zlib1g-dev gcc-multilib build-essential libsdl1.2-dev libglib2.0-dev libsdl-dev build-essential gcc-multilib glib2.0 automake screen pax gzip libtool-bin zlib1g:i386
At the end of all the output, you should see:
Step 3: Run the following commands to create a place to install PetaLinux Tools and start the installer:
cd /media/sf_downloads
sudo mkdir -p /opt/pkg/petalinux-v2018.2
sudo chmod -R a+rwX /opt/pkg/petalinux-v2018.2
sudo chown -R $USER:$USER /opt/pkg/petalinux-v2018.2
chmod +x petalinux-v2018.2-final-installer.run
./petalinux-v2018.2-final-installer.run /opt/pkg/petalinux-v2018.2
Note: this will take a few minutes
Note 2: using a -v2018.2 suffix will allow you to easily distinguish multiple versions of PetaLinux Tools
Step 4: Follow the prompts, accept the license agreements, etc…
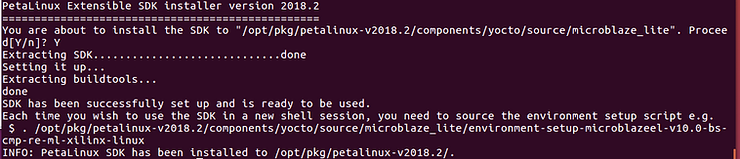
Step 5: Let the installer run
Note: you’ll see WARNING: No tftp server found. For JTAG based development this can be disregarded.
You should see:
Switch your Shell to Bash
Step 1: Open a new terminal and type chsh -s /bin/bash
Step 2: Type:
sudo rm /bin/sh
sudo ln -s /bin/bash /bin/sh
Step 3: Log out and log back in
Create a Project Based on the ZC706 BSP and Build it
Step 1: Open a new terminal
Step 2: Type:
mkdir ~/plxprjs
cd ~/plxprjs/
Step 3: Type:
source /opt/pkg/petalinux-v2018.2/settings.sh
petalinux-create -t project -s /media/sf_downloads/xilinx-zc706-v2018.2-final.bsp
You should see:

Step 4: Type:
cd ~/plxprjs/xilinx-zc706-2018.2/
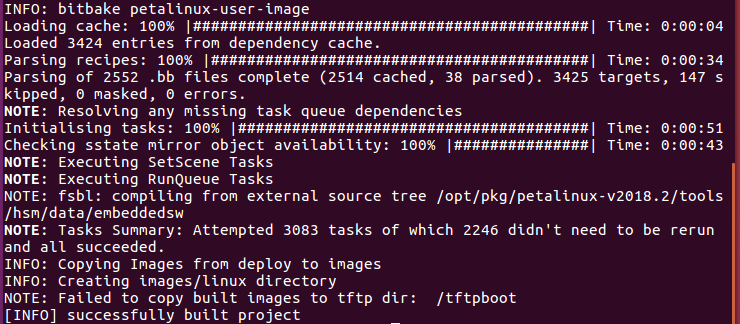
petalinux-build
Note: this will take some time and it may appear to hang.
You should see:
Start the Hardware Server
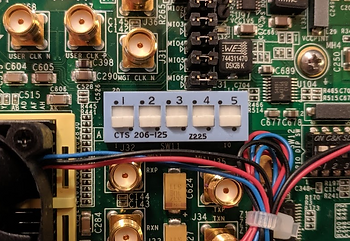
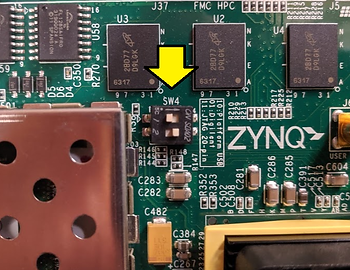
Step 1: Ensure that the Digilent JTAG chain is selected by checking that SW4 looks like:
Step 2: Click Vivado 2018.2
Step 3: Click Flow > Open Hardware Manager
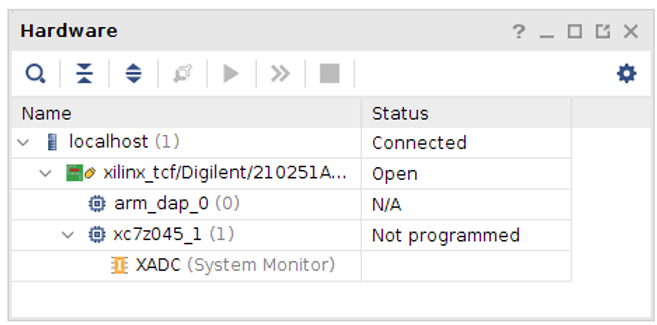
Step 4: Click Open target > Auto Connect
You should see:
Setup minicom
Step 1: Plug your USB-to-Serial cable in
Step 2: Find the USB #
A. Type ls -l /dev/ttyUSB*
B. Note what the /dev/ttyUSB it is, something like:
crw-rw—- 1 root dialout 188, 1 Aug 15 17:47 /dev/ttyUSB1
Step 3: Install minicom
A. Type sudo apt-get install minicom
B. Follow prompts to install
Step 4: Ensure you can run minicom without sudo
A. Type sudo usermod -a -G dialout $USER
B. Log out and log in
C. Check that you’re in the dialout group, type groups $USER
Step 5: Type sudo minicom -s
Note: You need to run this step with sudo so that you can Save setup as dfl later
Step 6: Press the down arrow twice to Serial port setup and press Enter
Step 7:
A. Press A, and set the serial device to /dev/ttyUSB0 and press Enter
B. Press E and set the Bps/Par/Bits to 115200 8N1 and press Enter
C. Press F until Hardware Flow Control in No
D. Press G until Software Flow Control is No
E. Press Enter
Step 8: Press the down arrow 3 times to Save setup as dfl and press Enter
Step 9: Press the down arrow 3 times to Exit from Minicom and press Enter
You should see:
Minicom is now configured
Run minicom
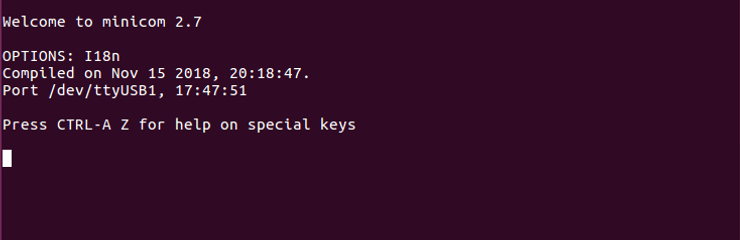
Type minicom
You should see:
Exit minicom
Type Control-a x and press Enter
Boot the Linux Kernel
Note: You will need to have a hardware server running. You’ll see this if you don’t have a hardware server running:
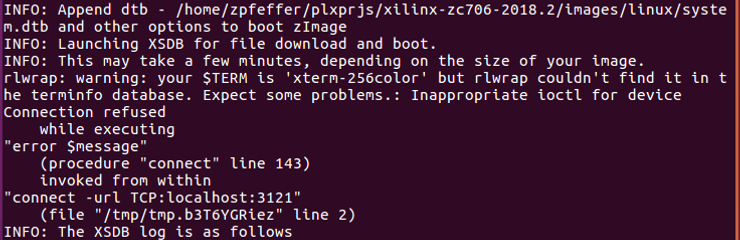
See above for instructions on starting a hardware server.
Step 1: Open a two new terminals
Step 2: Run minicom in one terminal
Step 3: In the other terminal, run these commands:
source /opt/pkg/petalinux-v2018.2/settings.sh
cd ~/plxprjs/
cd xilinx-zc706-2018.2/
petalinux-boot –jtag –fpga –kernel –hw_server-url TCP:localhost:3121
Step 3.1: Log in with root and the username and root as the password
Step 4: Boot U-Boot
A. Power off the ZC706 and power it on
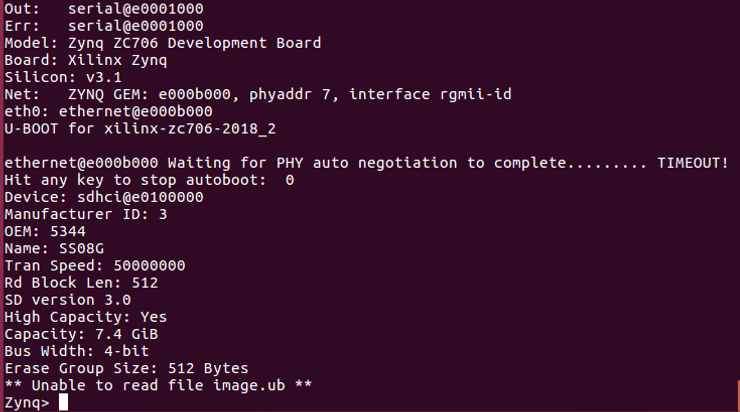
B. Type petalinux-boot –jtag –fpga –u-boot –hw_server-url TCP:localhost:3121
You should see:
Other Info
Disable Auto Logout on Ubuntu
Step 1: In Ubuntu, click Settings > Brightness & Lock
Step 2: Set the Turn screen off when inactive drop-down box to Never
Note on Supported Linux Distros
We’ll be using Ubuntu 2016.04.5.
The 2018.2 PetaLinux Tools Reference Guide [link] and the Vivado Release Notes [link] state that Ubuntu 2016.04.3 is supported. The SDK doc [link] states that Ubuntu 16.04.2 is supported, however, we’ll use Ubuntu 2016.04.5 and see if there are any issues.
TODO: report any issues with Vivado, PetaLinux Tools and/or SDK 2018.2 when using Ubuntu 2016.04.5.
There’s a breakdown of all the versions supported on 2018.2 Vivado, PetaLinux Tools and the SDK [here].
References
-
zachpfeffer.com: Installing 2017.4 Vivado and SDK on Linux at [link]
-
zachpfeffer.com: Download and Install Xilinx’s 2017.4 PetaLinux Tools at [link]
-
zachpfeffer.com: Configure minicom for a USB-to-Serial Converter at [link]
-
zachpfeffer.com: Xilinx 2018.2 Software Tool Installation Overview and Assessment at [link]
-
The 4.2.2.1. Installing the Linux Guest Additions chapter of Oracle® VM VirtualBox® User Manual at [link]
-
Ask Ubuntu: How to access shared folders in Ubuntu VM(Oracle Virtualbox) and link them to the home folder at [link]
-
xilinx.com: AR# 71547 2018.2.2 Vivado - Vivado 2018.2 Update 2 (2018.2.2) Release Notes and Known Issues at [link]
-
xilinx.com: Xilinx Zynq-7000 SoC ZC706 Evaluation Kit at [link]
-
xilinx.com: Vivado Design Suite User Guide, Release Notes, Installation, and Licensing UG973 (v2018.2) July 23, 2018 at [link]
-
xilinx.com: ZC706 Evaluation Board for the Zynq-7000 XC7Z045 SoC User Guide UG954 (v1.7) July 1, 2018 at [link]
-
forums.xilinx.com: Petalinux settings.sh problem at [link]
-
Xilinx logo found via https://twitter.com/xilinxinc at [link]