
Add a disk to an Ubuntu VirtualBox VM
![]()
This post shows you how to add a new SATA disk to a Oracle VirtualBox Version 5.1.30 r118389 (Qt5.6.2) VM and install it in Ubuntu 16.04.2.
Steps
Create Disk File
1. Right-click on the VM you’d like to add a disk to:
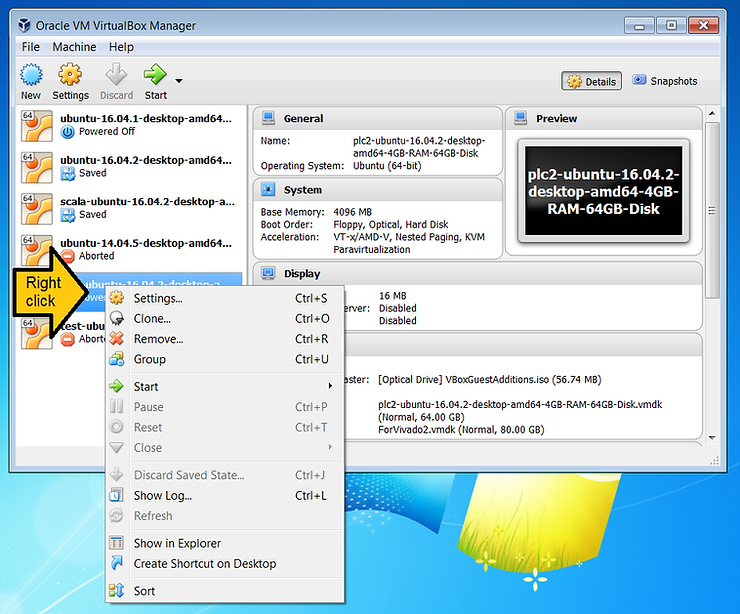
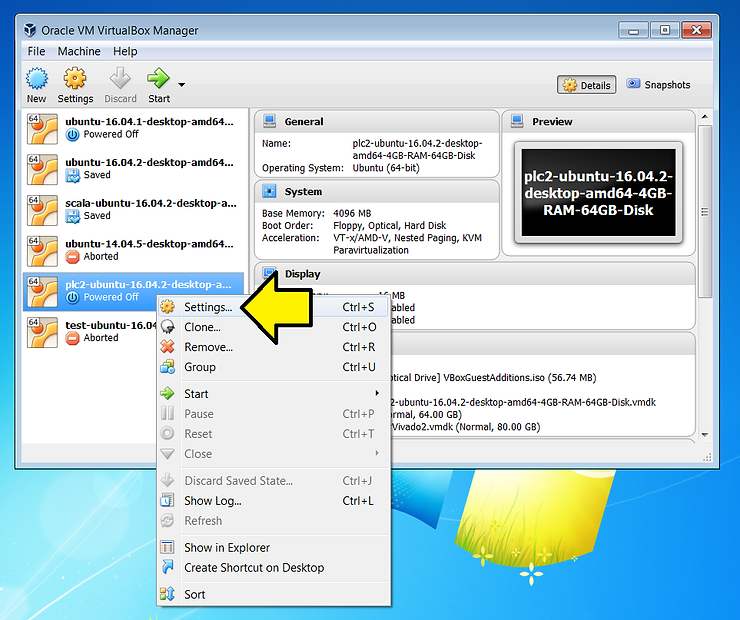
2. Click Settings…
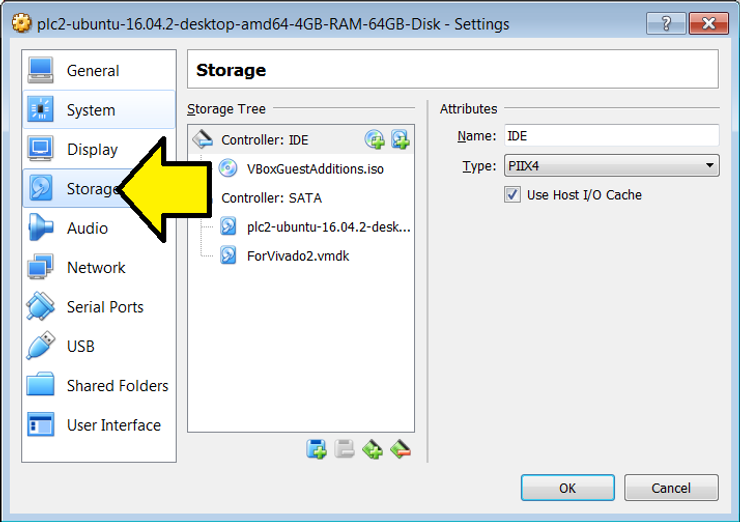
3. Click Storage
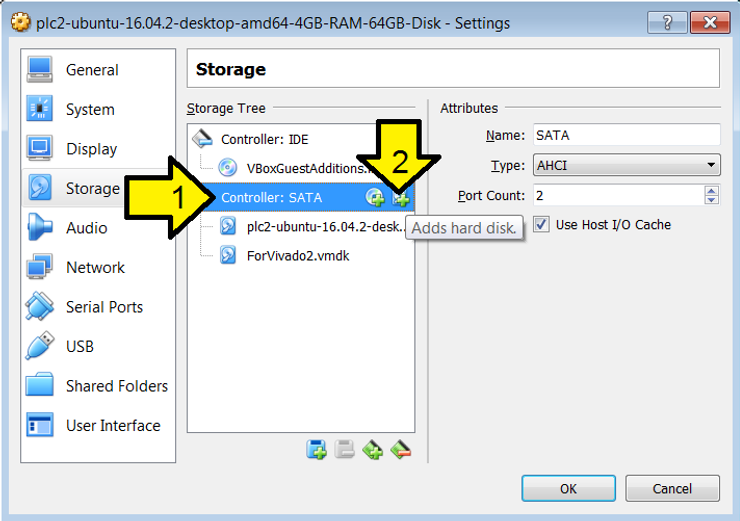
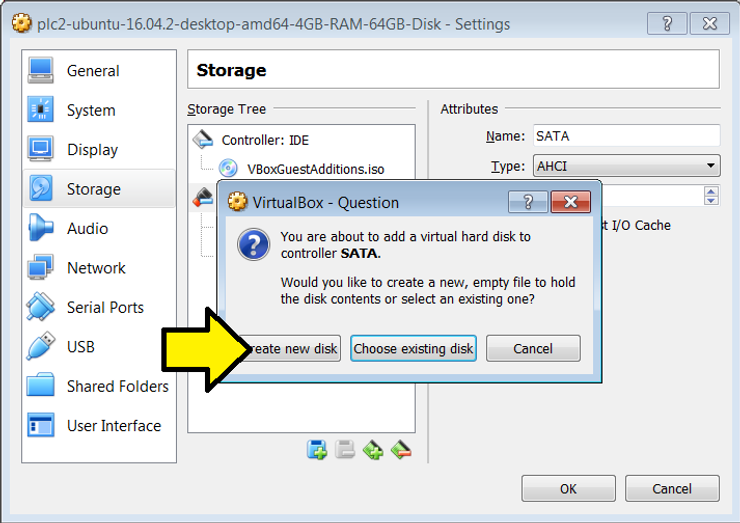
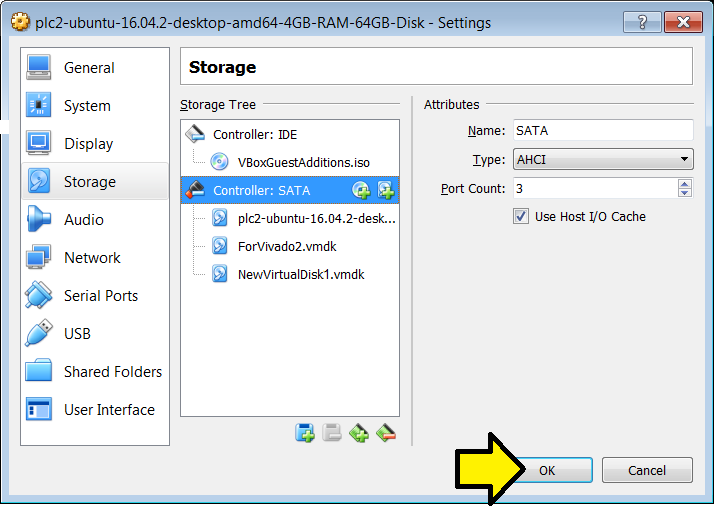
4. (1) Click on Controller: SATA and (2) click on the the ’+’ disk icon
5. Click Create new disk
6. Select VMDK (Virtual Machine Disk)
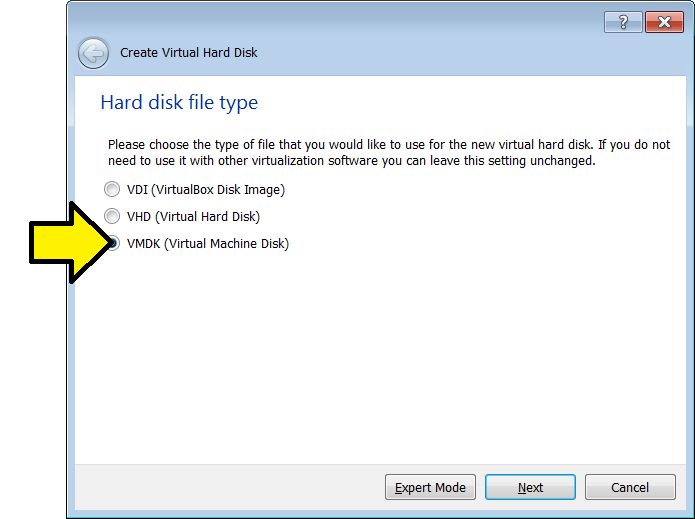
VMDK description below.
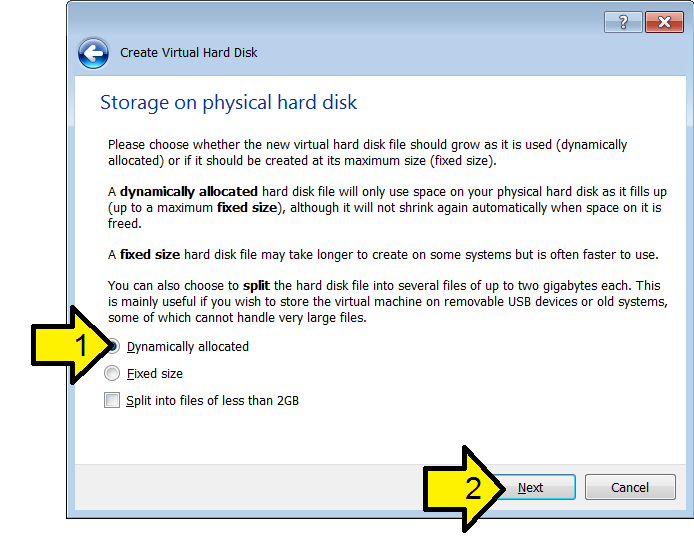
7. (1) Click on Dynamically allocated and (2) click Next
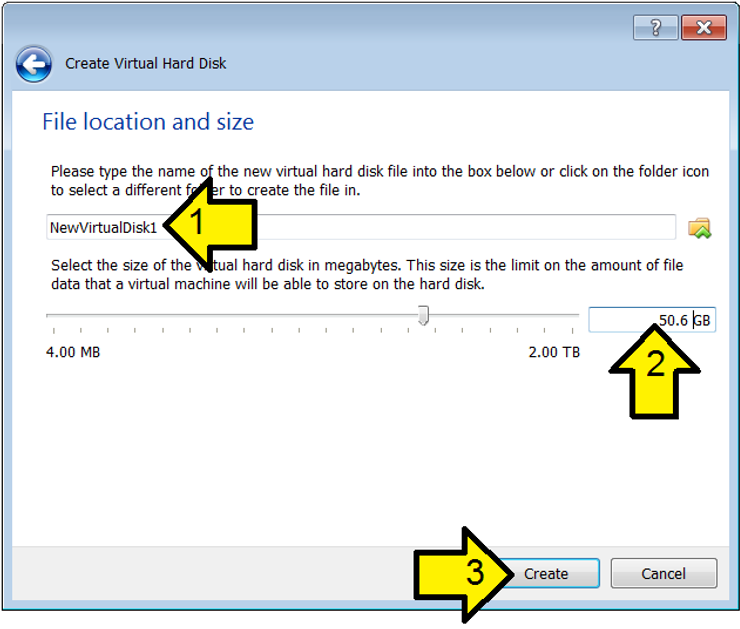
8. (1) Name the disk, (2) Select a size and (2) click Create
9. Click OK
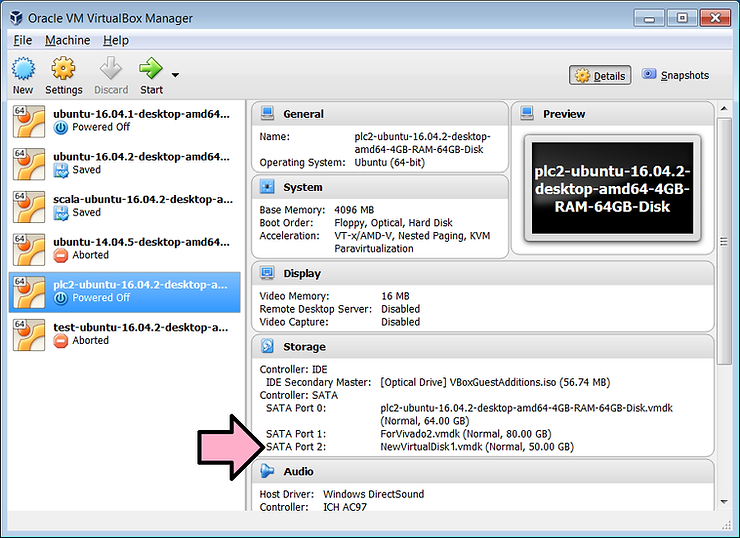
10. Note the SATA Port the disk is on:
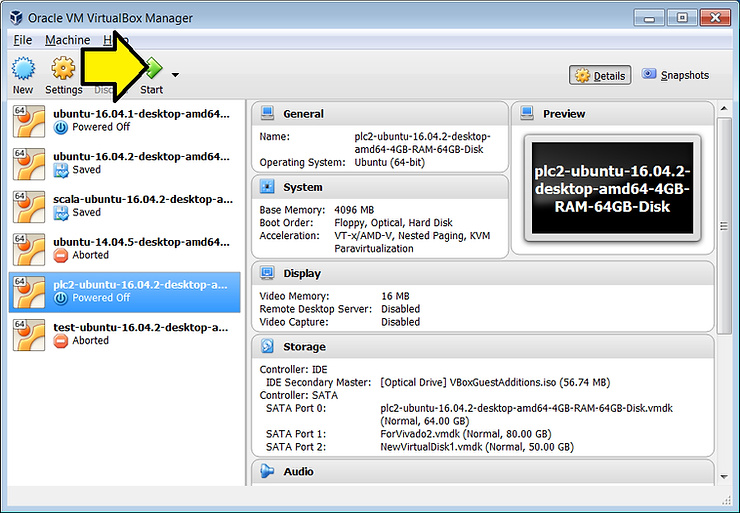
11. Click Start to start the VM
Partition
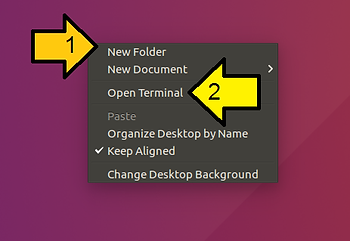
12. In Ubuntu, (1) right click on the desktop and (2) click Open Terminal
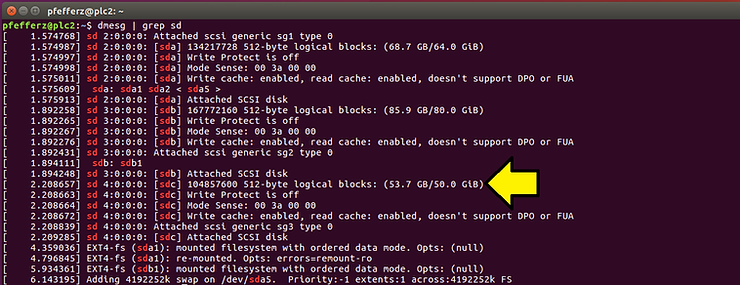
13. Type
dmesg | grep sd
Look for the sd that matches the size of the disk you created; its sdc here:
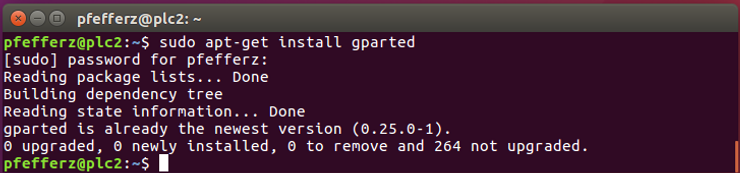
14. Install gparted. At the command line type:
sudo apt-get install gparted
Type ‘Y’ when prompted.
Note: this command is safe to run if its already installed. If its installed you’ll see:
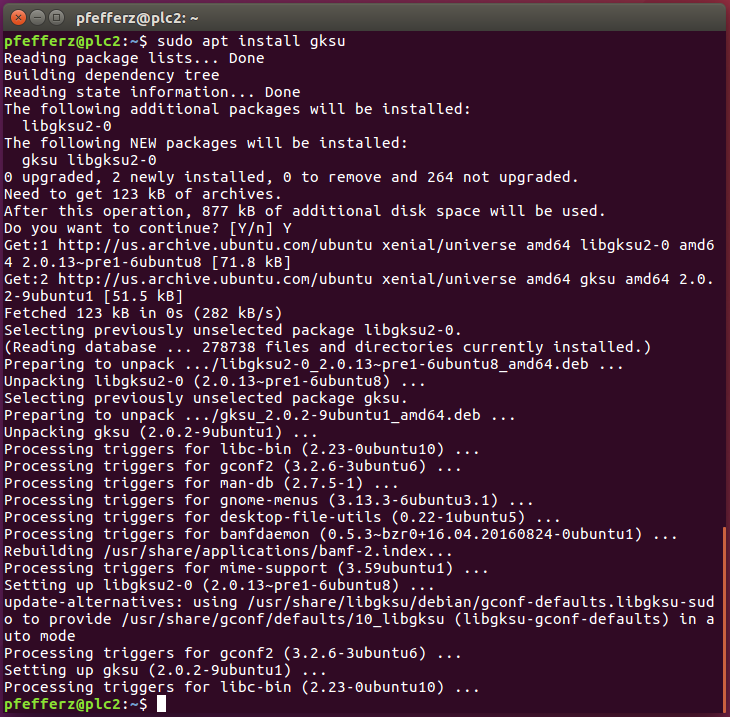
15. Install gksu. At the command line type:
sudo apt install gksu
If you need to install it, type ‘Y’ when prompted.
You’ll see something similar to:
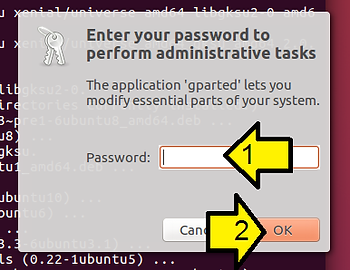
16. At the command line type this to start GParted:
gksudo gparted
17. (1) Enter your sudo password and (2) click OK
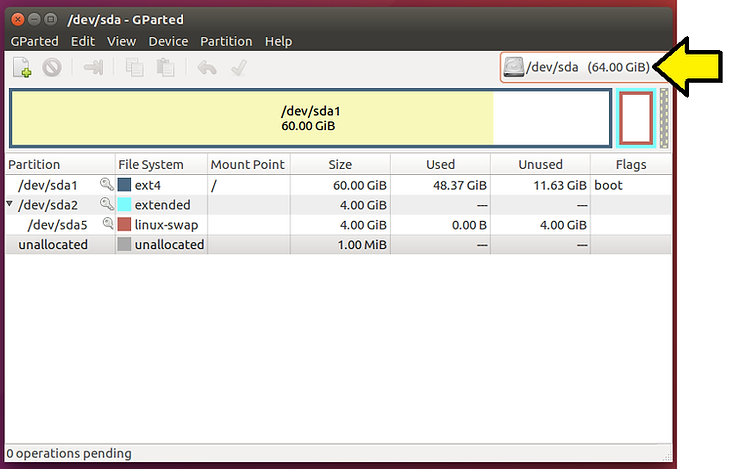
18. Click the /dev/sda drop down
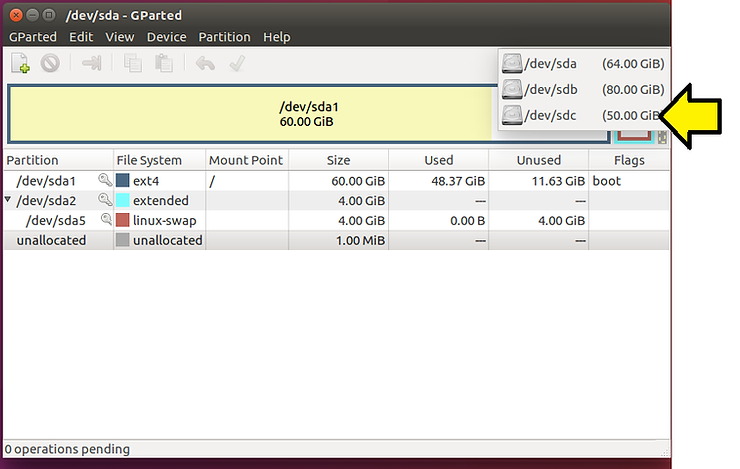
19. Click what you saw in dmesg (sdc here)
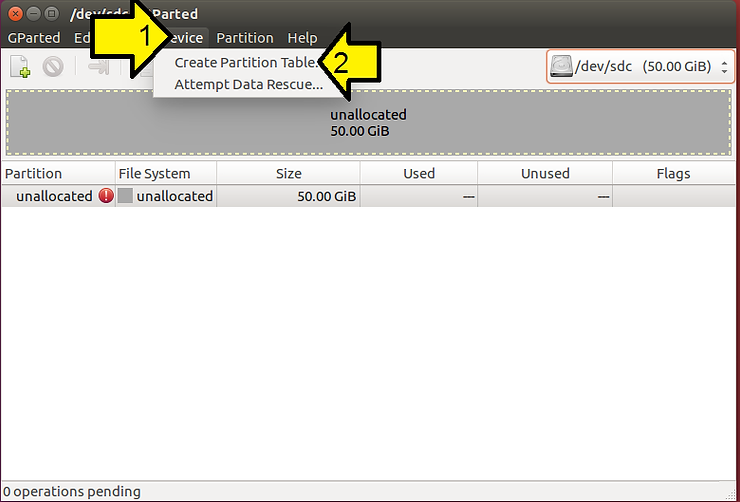
20. (1) Click Device and (2) Create Partition Table…
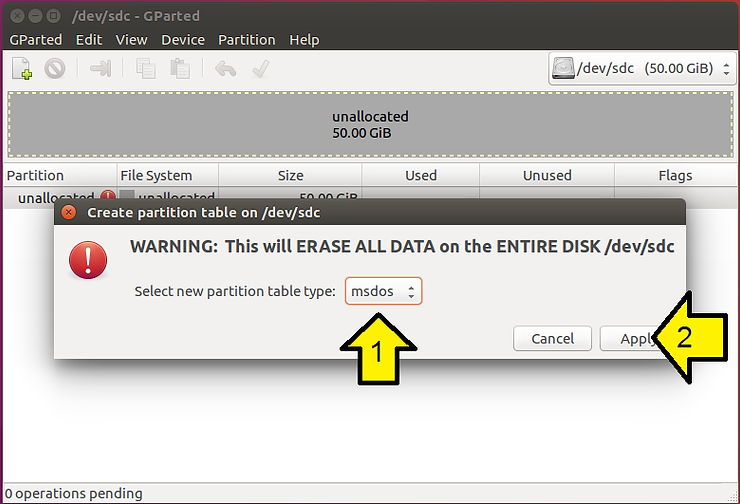
21. (1) Leave as msdos and (2) click Apply
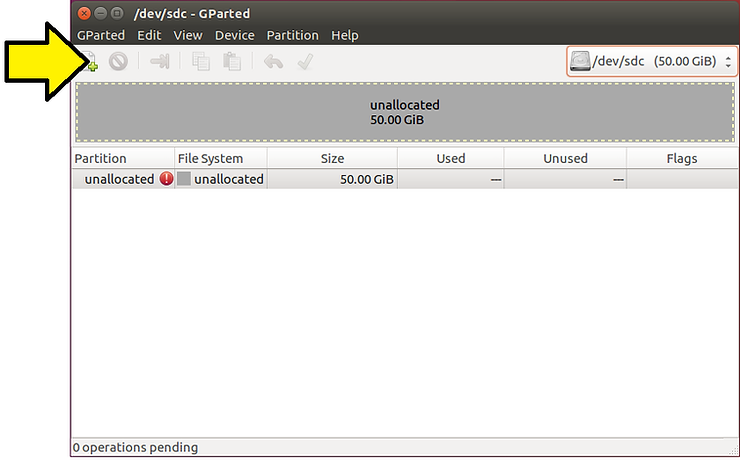
22. Click the Create a new partition in the selected unallocated space ’+’ file icon
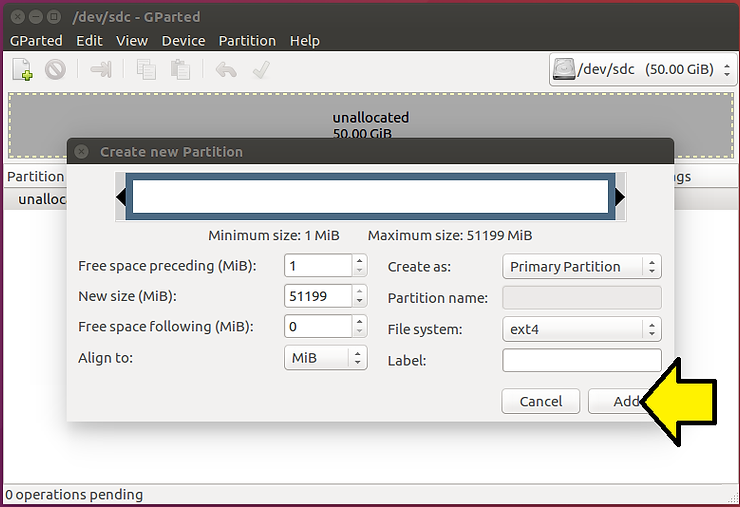
23. Leave everything as is and click Add
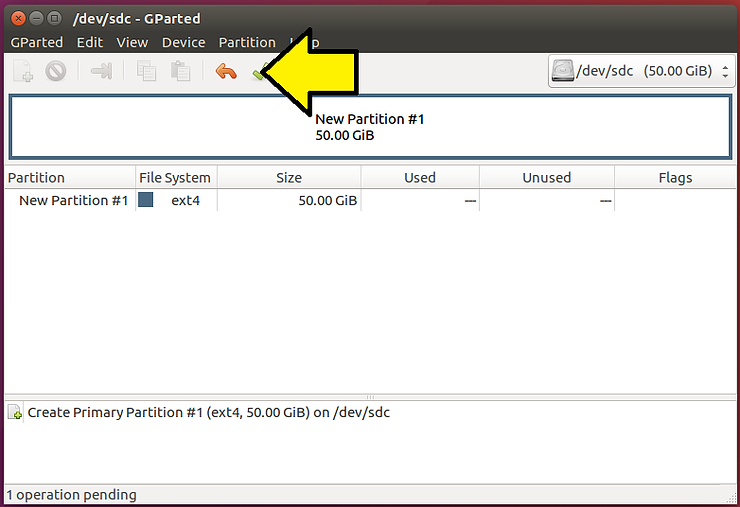
24. Click the Apply All Operations green checkbox
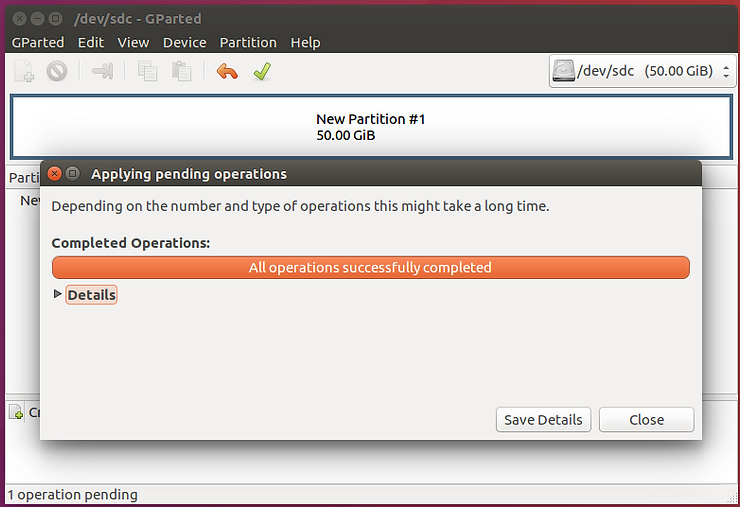
25. Click Apply again
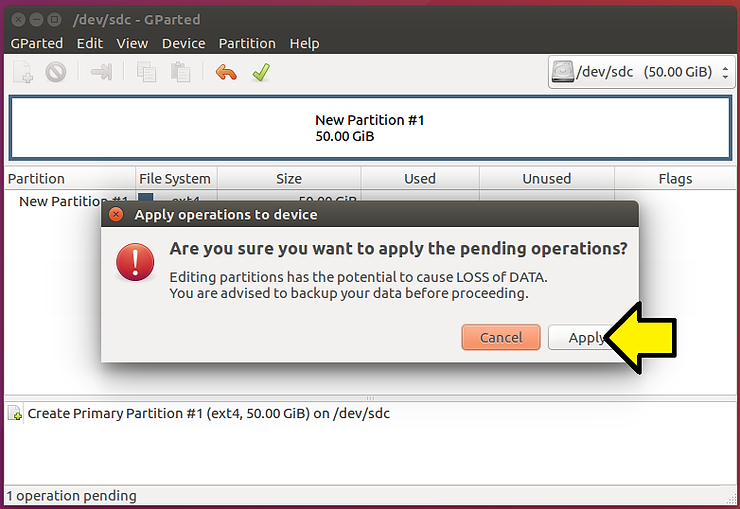
You should see All operations successfully completed
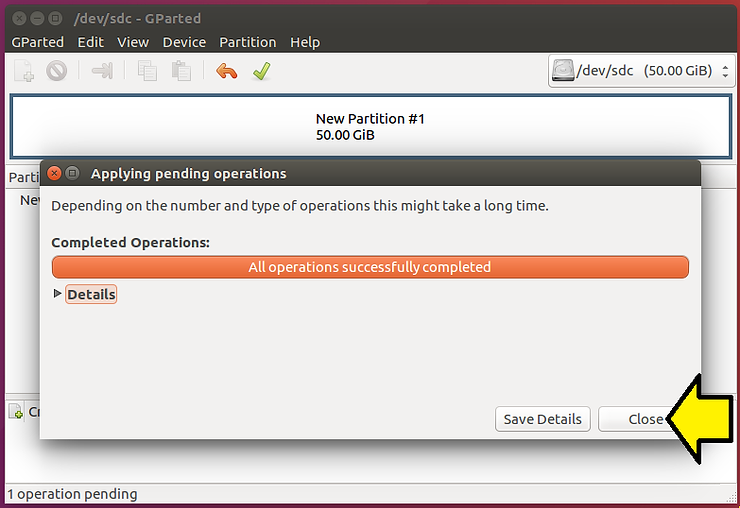
26. Click Close
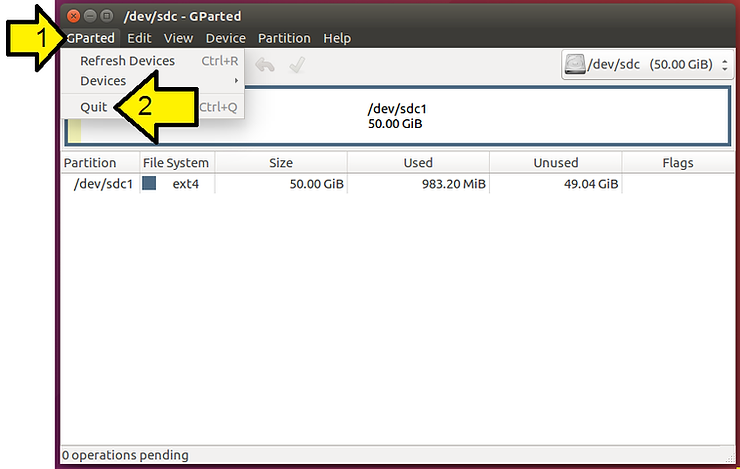
27. Quit GParted: (1) Select GParted and click (2) Quit
Mounting
28. Create a mount point
At the command line type:
sudo mkdir /hdd2
At the command line type:
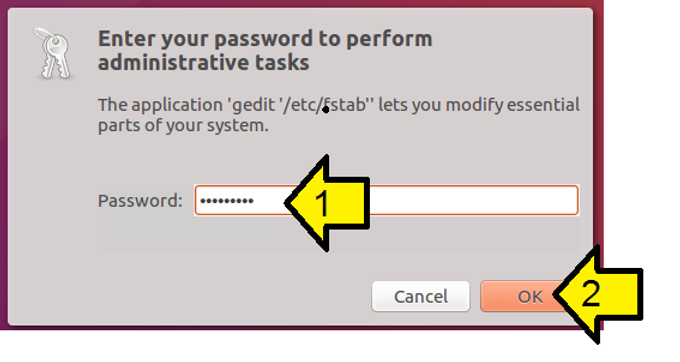
gksu gedit /etc/fstab
30. (1) Enter your sudo password and (2) click OK:
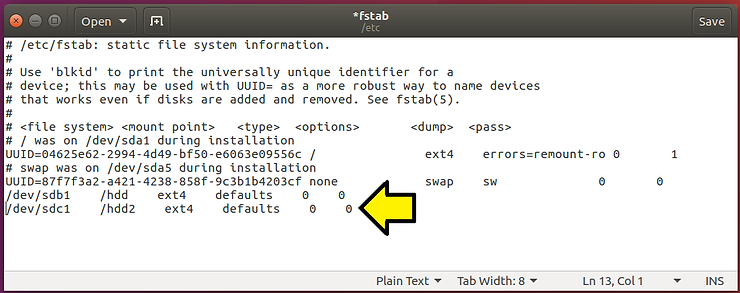
31. Enter this as the last line:
/dev/sdc1 /hdd2 ext4 defaults 0 0
It should look similar to:
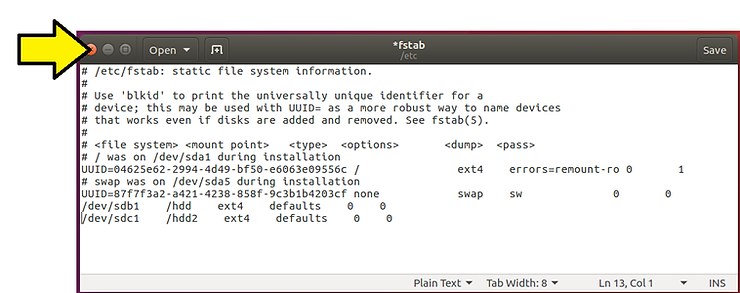
32. Click Save

33. Click the ‘x’ to close
34. Mount now
At the command line type:
sudo mount -a
35. Change the user so you can read/write:
At the command line type:
sudo chown -R pfefferz:pfefferz /hdd2
36. Test it
At the command line type:
touch /hdd2/test.txt
Then at the command line type:
ls /hdd2

Test Mount at Boot
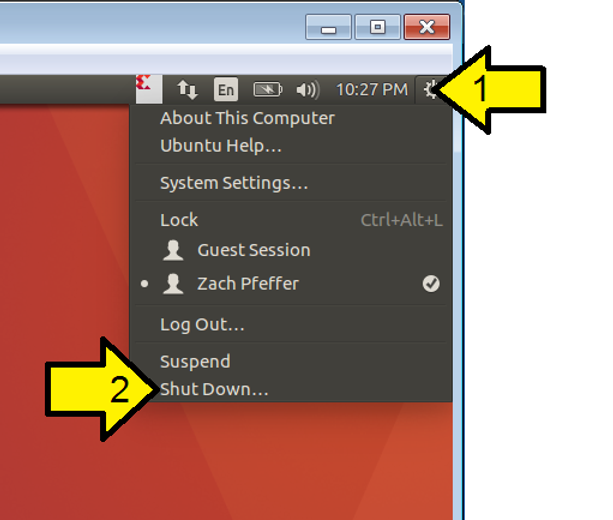
37. Reboot: (1) click the gear and (2) click Shut Down…
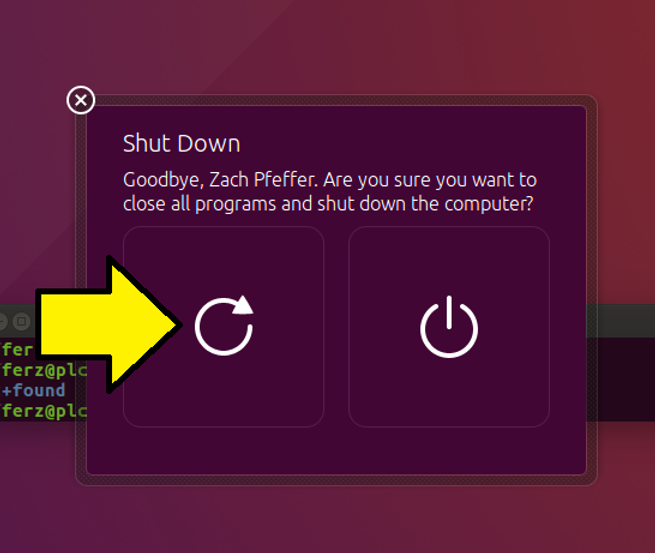
38. Click the reboot button:
39. After rebooting, test it
At the command line type:
touch /hdd2/test-after-reboot.txt
Then at the command line type:
ls /hdd2
You should see your test.txt:

References
-
The VirtualBox logo is from https://www.virtualbox.org/
-
“5.2. Disk image files (VDI, VMDK, VHD, HDD)” @ link
-
InstallingANewHardDrive from Ubuntu @ link
Supporting Excerpts
From Ch5 of the VirtualBox online manual:
VirtualBox supports four variants of disk image files:
-
Normally, VirtualBox uses its own container format for guest hard disks – Virtual Disk Image (VDI) files. In particular, this format will be used when you create a new virtual machine with a new disk.
-
VirtualBox also fully supports the popular and open VMDK container format that is used by many other virtualization products, in particular, by VMware.[26]
-
VirtualBox also fully supports the VHD format used by Microsoft.
-
Image files of Parallels version 2 (HDD format) are also supported.[27] For lack of documentation of the format, newer formats (3 and 4) are not supported. You can however convert such image files to version 2 format using tools provided by Parallels.
There are two options of how to create a disk image: fixed-size or dynamically allocated.
-
If you create a fixed-size image, an image file will be created on your host system which has roughly the same size as the virtual disk’s capacity. So, for a 10G disk, you will have a 10G file. Note that the creation of a fixed-size image can take a long time depending on the size of the image and the write performance of your hard disk.
-
For more flexible storage management, use a dynamically allocated image. This will initially be very small and not occupy any space for unused virtual disk sectors, but will grow every time a disk sector is written to for the first time, until the drive reaches the maximum capacity chosen when the drive was created. While this format takes less space initially, the fact that VirtualBox needs to expand the image file consumes additional computing resources, so until the disk file size has stabilized, write operations may be slower than with fixed size disks. However, after a time the rate of growth will slow and the average penalty for write operations will be negligible.