
Connect to and Control a Synaccess NPC-22 netCommander from Ubuntu 16.04.3 Running in a VirtualBox V
![]()
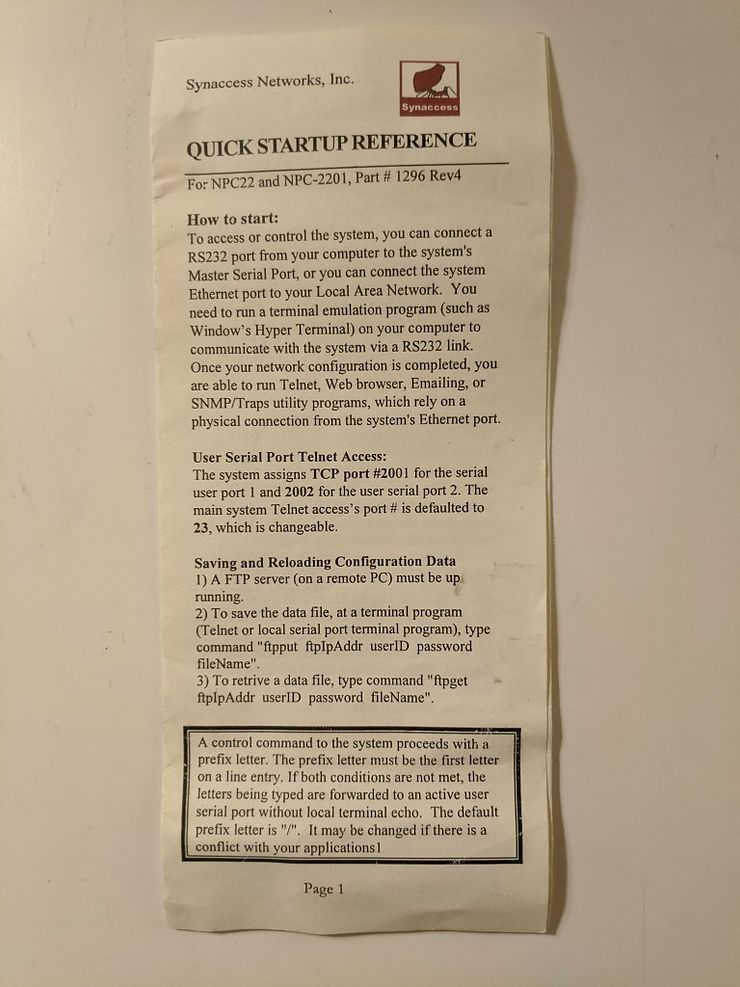
This post demonstrates how to connect to and control a Synaccess NPC-22 netCommander (Rev 4) from Ubuntu 16.04.5 running in a VirtualBox managed VM via a Prolific Technology Inc. USB-to-serial port converter to turn a target on and off. It also shows you how to simultaneously connect to a USB-to-UART converter connected to a target and the Prolific Tech converter with minicom. The target in this case is a ZC706 from Xilinx. I also include a copy of the original docs for Rev4 NPC-22.The post also shows how to create a script that will power cycle the target using minicom.
Steps
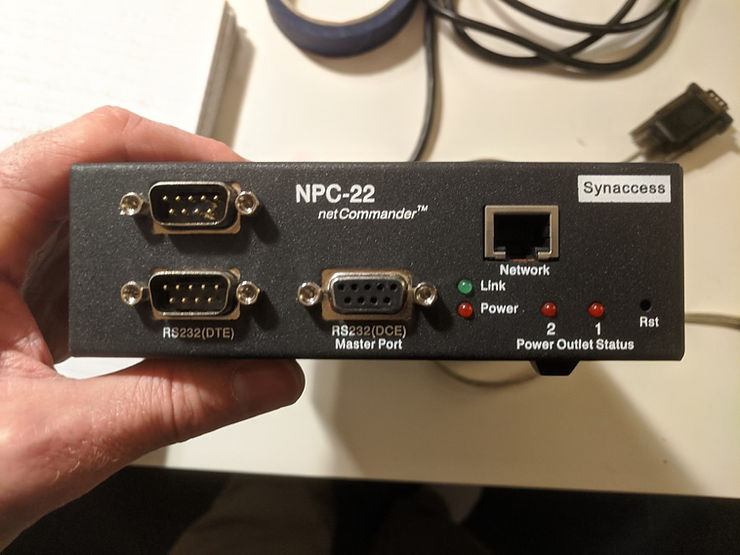
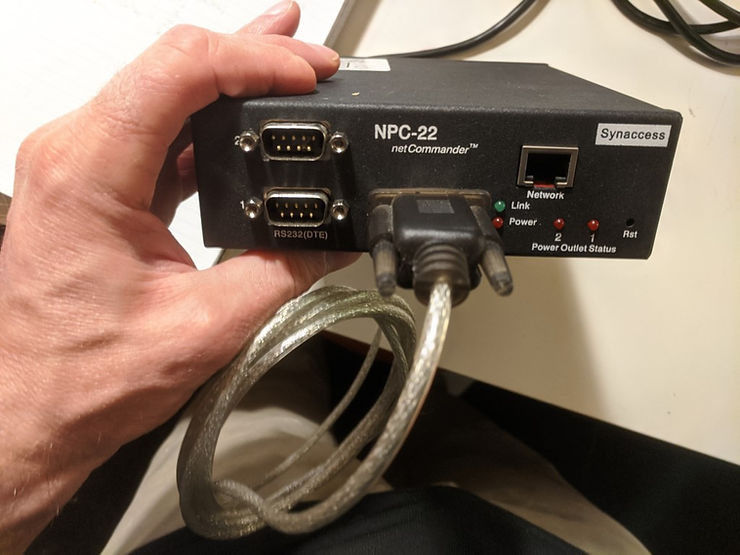
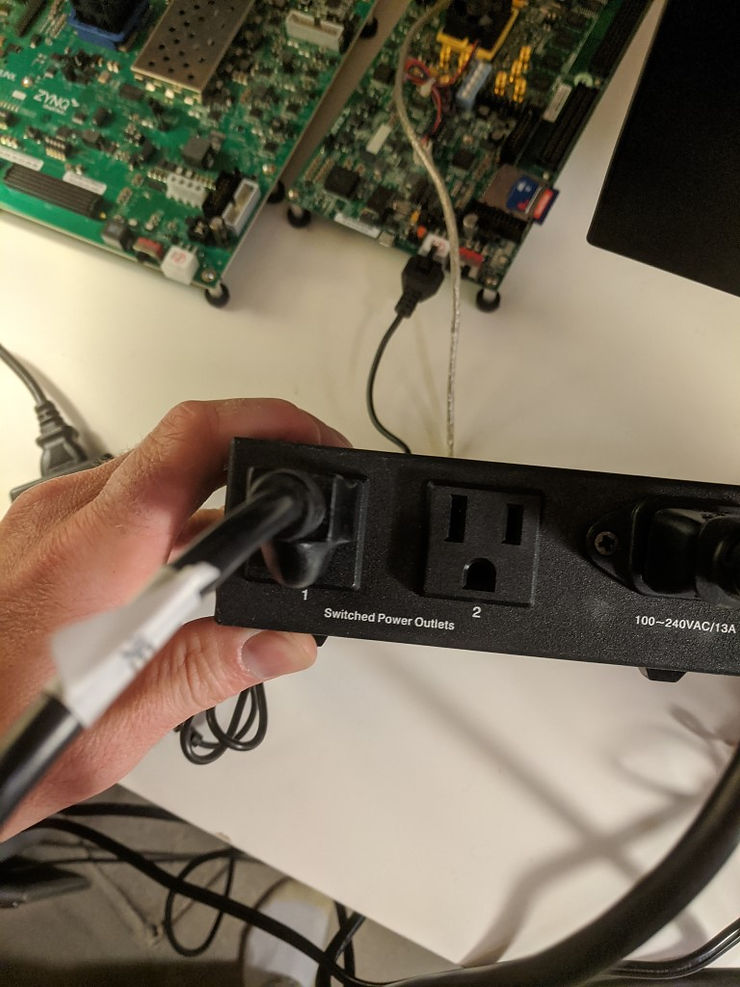
Step 1: Connect the female DB9 plug of the Prolific Technology Inc. USB-to-serial port converter to the RS232 DCE Master Port on the NPC-22
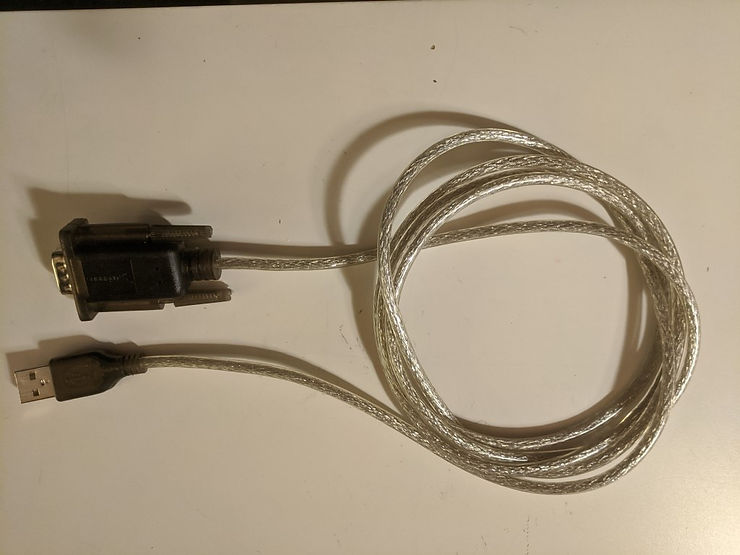
Step 2: Connect the USB plug of the Prolific Technology Inc. USB-to-serial port converter to a USB hub.
Step 3: Connect the USB-to-serial port of the target to the USB hub
Step 4: Connect the power supply of the NPC-22
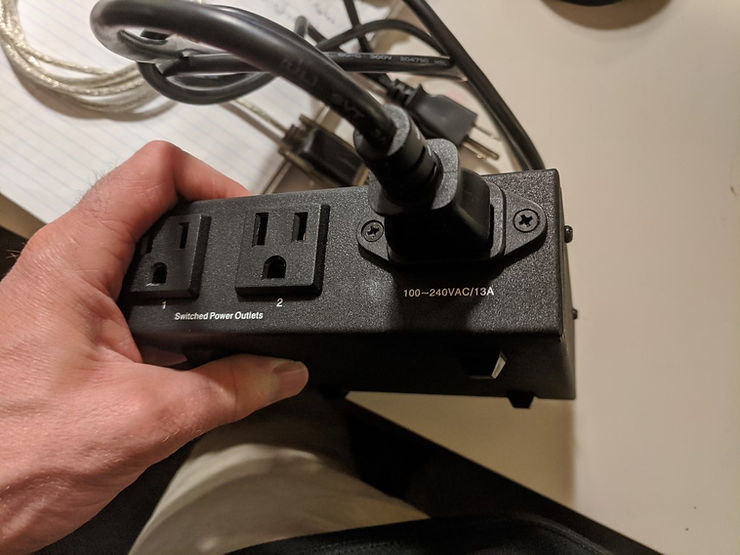
Step 5: Connect the target to port 1 of the NPC-22
Step 6: In Ubuntu type dmesg
You should see something like:
[ 5215.223938] usb 1-2: new high-speed USB device number 8 using xhci_hcd
[ 5215.516571] usb 1-2: New USB device found, idVendor=0403, idProduct=6014
[ 5215.516573] usb 1-2: New USB device strings: Mfr=1, Product=2, SerialNumber=3
[ 5215.516574] usb 1-2: Product: Digilent USB Device
[ 5215.516575] usb 1-2: Manufacturer: Digilent
[ 5215.516576] usb 1-2: SerialNumber: 210251A07C1B
[ 5215.551668] ftdi_sio 1-2:1.0: FTDI USB Serial Device converter detected
[ 5215.551737] usb 1-2: Detected FT232H
[ 5215.553716] usb 1-2: FTDI USB Serial Device converter now attached to ttyUSB0
[ 5215.971175] usb 1-3: new full-speed USB device number 9 using xhci_hcd
[ 5216.278479] usb 1-3: New USB device found, idVendor=10c4, idProduct=ea60
[ 5216.278481] usb 1-3: New USB device strings: Mfr=1, Product=2, SerialNumber=3
[ 5216.278482] usb 1-3: Product: CP2103 USB to UART Bridge Controller
[ 5216.278483] usb 1-3: Manufacturer: Silicon Labs
[ 5216.278484] usb 1-3: SerialNumber: 0001
[ 5216.311008] cp210x 1-3:1.0: cp210x converter detected
[ 5216.317982] usb 1-3: cp210x converter now attached to ttyUSB1
[ 5216.573297] ftdi_sio ttyUSB0: FTDI USB Serial Device converter now disconnected from ttyUSB0
[ 5216.573310] ftdi_sio 1-2:1.0: device disconnected
[ 5227.674848] usb 1-4: new full-speed USB device number 10 using xhci_hcd
[ 5227.969598] usb 1-4: New USB device found, idVendor=067b, idProduct=2303
[ 5227.969600] usb 1-4: New USB device strings: Mfr=1, Product=2, SerialNumber=0
[ 5227.969601] usb 1-4: Product: USB-Serial Controller
[ 5227.969602] usb 1-4: Manufacturer: Prolific Technology Inc.
[ 5228.001625] pl2303 1-4:1.0: pl2303 converter detected
[ 5228.013169] usb 1-4: pl2303 converter now attached to ttyUSB0
Step 6.1: Note down that the Digilent device is connected to ttyUSB1 and the Prolific Technology Inc. connector connected to the Synaccess is connected to ttyUSB0.
Step 7: Follow the instructions listed at [link] to set up minicom (don’t skip)
Step 8: Open a terminal window and type minicom -b 9600 -D /dev/ttyUSB0 to talk to the Synaccess.
This ^^^ will use the default set up from the instructions above, but use 9600 for the baud. -D isn’t needed since its been set up in the config, but it is listed for clarity.
Step 8.1: Press Enter once.
You should see:
>
If you don’t see a prompt press the Reset button for about 5 secs, until the lights blink:
Step 8.2: Type /help
You should see
>/help


************************************************************
*                                                          *
*                                                          *
*     Help Menu                                            *
*                                                          *
*                                                          *
************************************************************
>
>
  /apVbs    n  Displays AutoPing run-time info(0-disable,1-enable).
  /date        Displays current date.
  /emailvbs n  Displays Emailing run time info(0-disable,1-basic,2-detailed).
  /emailget    Starts email reading immediately.
  /emailsend   Sends a test email message immediately
  /ecmd        Sets email command delimitor(Select: &,-,+,~,$,*,>,|,<, or ?).
  /ftpget ip id pwd fileName - Get system data file from a FTP server.
  /ftpput ip id pwd fileName - Put system data file to a FTP server.
  /login       Enters user login.
  /logout      Exits current login.
  /mac         Displays Ethernet port Mac address.
  /nwset       Restarts Ethernet network interface.
  /nwshow      Displays network Status.
  /ping        Pings a host. E.g.: ping 192.168.0.1, or ping yahoo.com.
  /pm v        Sets TCP port(2001/2002) to Telnet(v-'t') or Binary mode(v-'b')
  /prsv n      Reserves power outlet #n for current login user.
  /pset n v    Sets power outlet #n to v(value 1-on, 0-off).
  /ps v        Sets all power outlets to v(value 1-on, 0-off).
  /pshow       Displays power outlet status.
  /pTmshow     Displays power outlet timer information.
  /punrsv n    Unreserves power outlet #n from current login user.
  /rb n        Reboots power outlet #n.
  /save        Saves configuration data.
  /setup       Starts system configuration menu.
  /sshow       Displays console ports configuration status.
  /srsv n      Reserves console port #n to current login user.
  /sset n      Sets active user serial port #n.
  /sunrsv n    Unreserves console port from the current login user.
  /sysshow     Displays system information.
  /time        Displays current time.
  /usershow    Displays all users.
  /whoami      Displays current login user.
  /ver         Displays hardware and software versions
  /wol n       Sends a WoL packet specified by power outlet #n settings.
  /!           Repeats previous command
 !!! Important: a control command must proceed with the symbol "/"
>      at the beginning of a command line input. To change it, type "/setup".
> !!! Use TCP port # 2001 & 2002 for accessing serial port 1 & 2.
Step 9: Open another terminal and type minicom -D /dev/ttyUSB1
This ^^^ will use the default, but connect to /dev/ttyUSB1
Step 10: Turn the target on and off with:
Off:
>/pset 1 0
On: >/pset 1 1
A Script to Turn the Target On and Off and Exit minicom
Create a file called offon.txt with:
send /pset 1 0 sleep 1 send /pset 1 1 sleep 1 ! killall -9 minicom
…and call minicom with:
minicom -b 9600 -D /dev/ttyUSB0 -S offon.txt
This is “runscript” see [link] (this had the tip about ! killall -9 minicom). I also consulted [link].
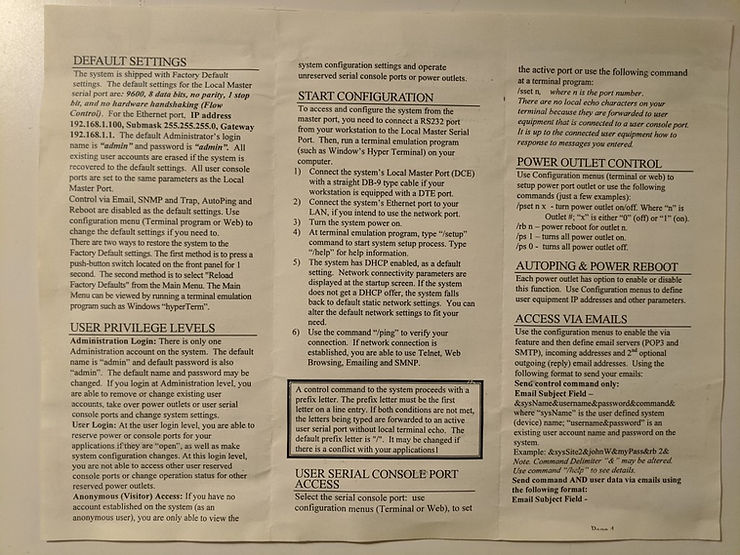
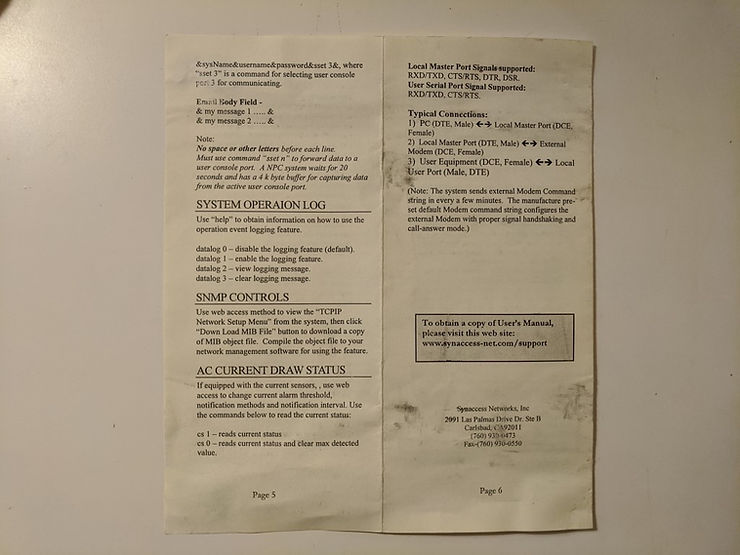
Original NPC-22 Documentation
References