
Download, Install and License Vivado 2017.4 on Windows 7
This post lists the step-by-step instructions for downloading and installing Vivado 2017.4 on a Windows 7 machine and getting a 30-day evaluation license.
Download Vivado
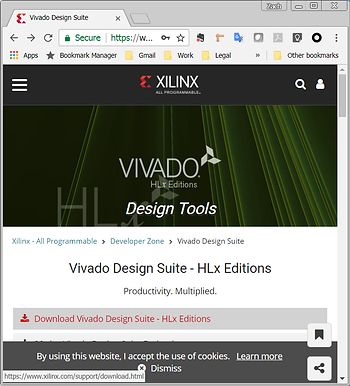
1. Go to https://www.xilinx.com/products/design-tools/vivado.html
and click on Download Vivado Design Suite - HLX Editions.
…and click on Vivado HLx 2017.4: All OS installer Single-File Download:
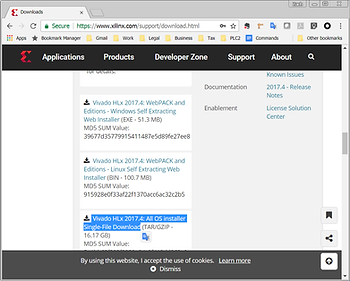
..and Sign in and click through the export acceptance.
2. Go to http://www.7-zip.org/
Get 64-bit version: http://www.7-zip.org/a/7z1801-x64.exe
3. Double click on it and install it.
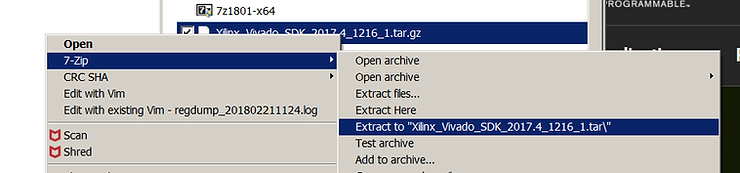
4. Right click on the tar.gz and select Extract to Xilinx_SDK_2017.4_1216_1.tar
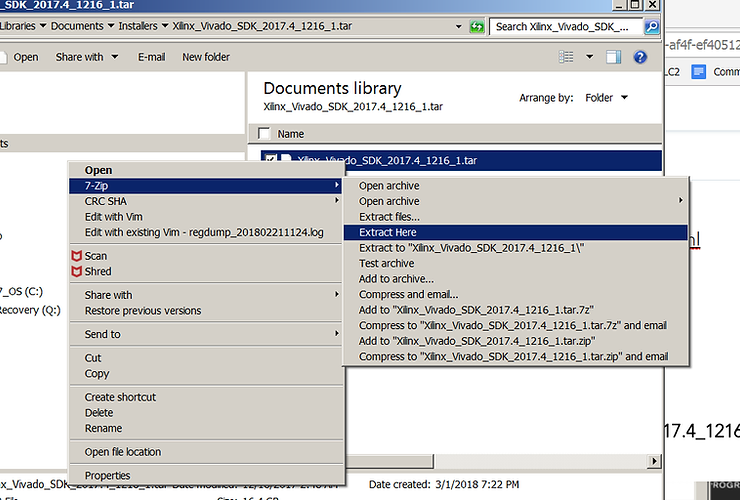
5. Open the resulting directory named Xilinx_SDK_2017.4_1216_1.tar and right click on Xilinx_Vivado_SDK_2017.4_1216_1.tar. It took my T460 about a minute and and a half to extract the archive.
6. Click on xsetup. Then Click Yes to allow Windows to install it.
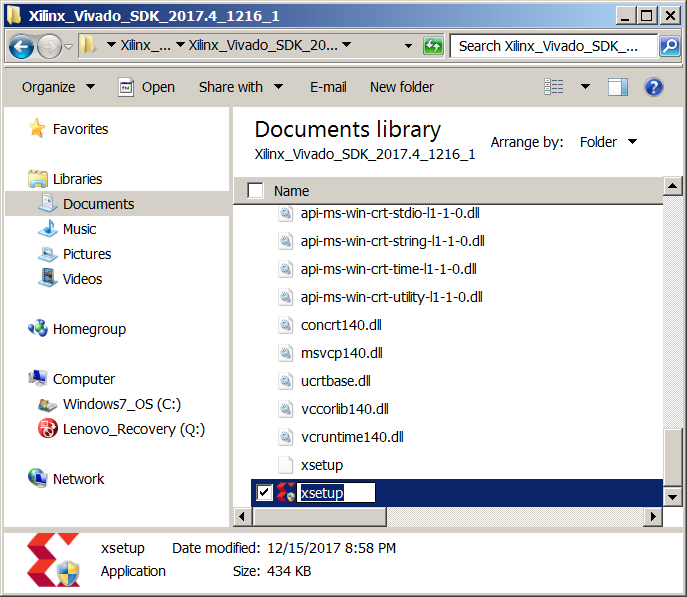
xsetup will launch
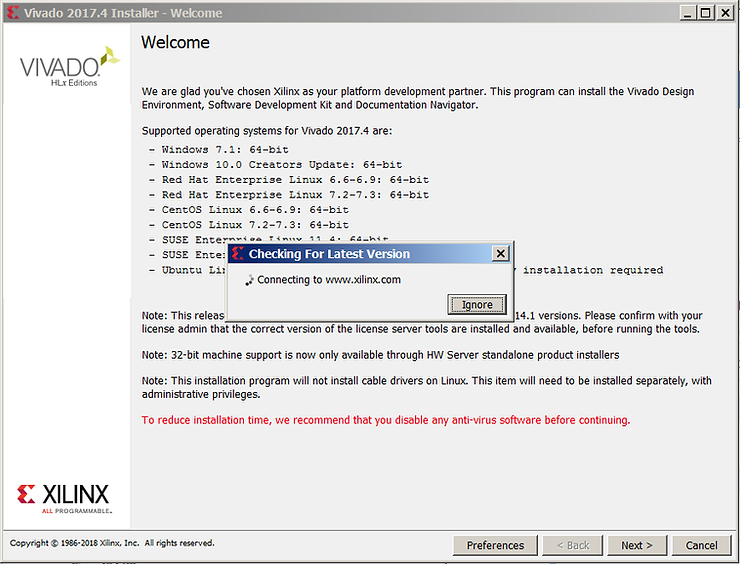
7. Click Next>. Check all the Agree boxes. Click Next>. Select Vivado HL System Edition. Click Next>.
8. Ensure the Software Development Kit (SDK) and Engineering Sample Devices are checked.
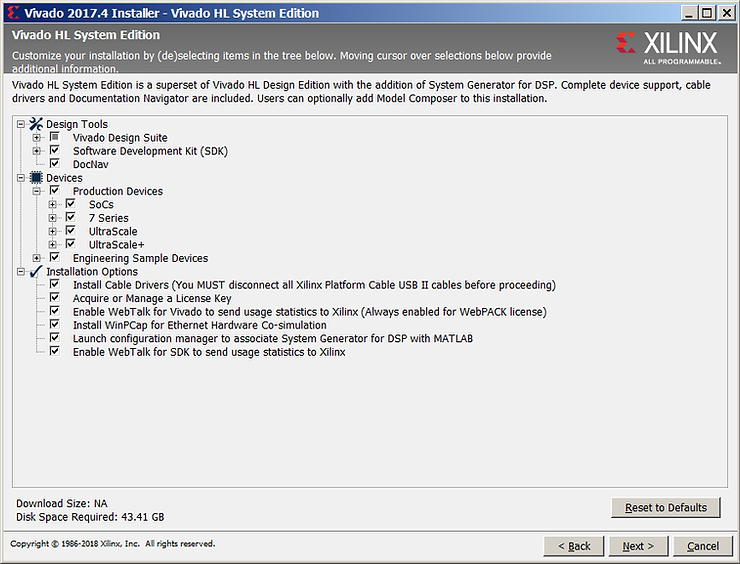
9. Click Next>.
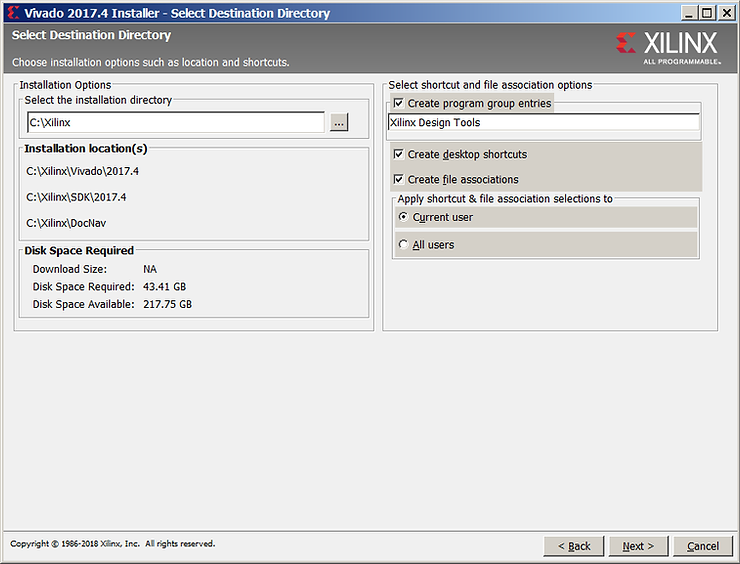
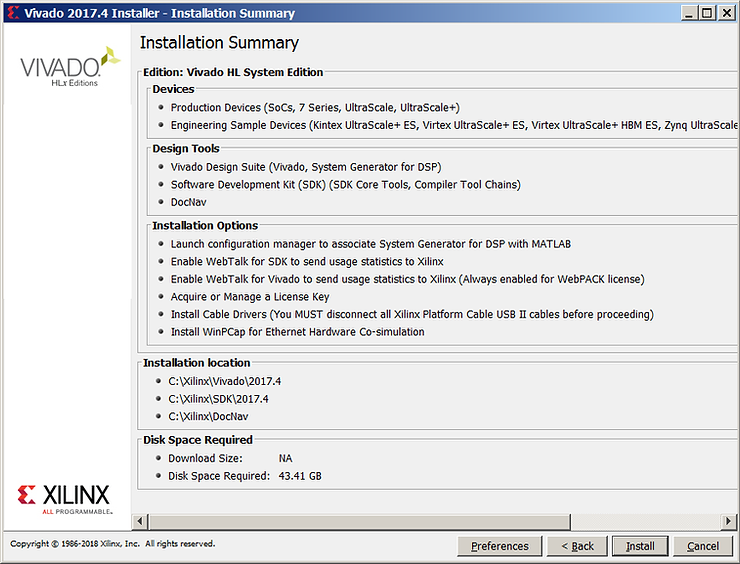
10. Install into C:\Xilinx (the default). Click Next> and accept to have the installer create C:\Xilinx. Note the installation take 43.41 GBs of diskspace.
11. Now click install on the Installation Summary screen.
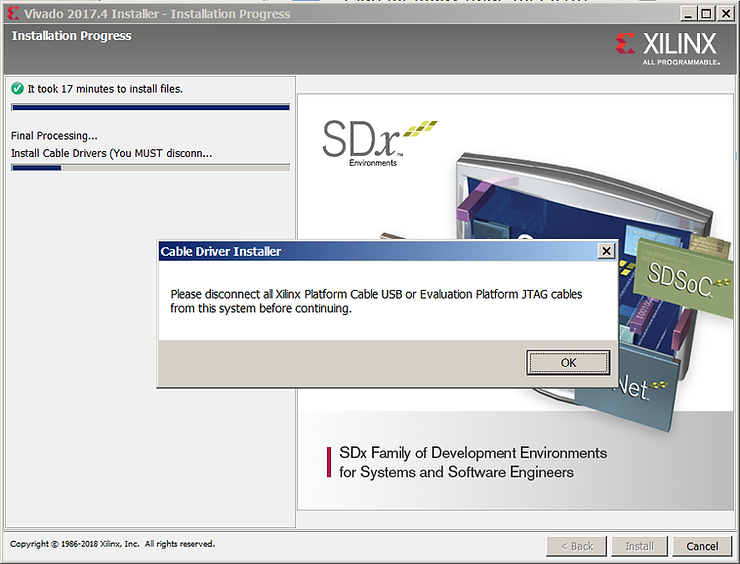
12. Disconnect any JTAG cables and click okay.
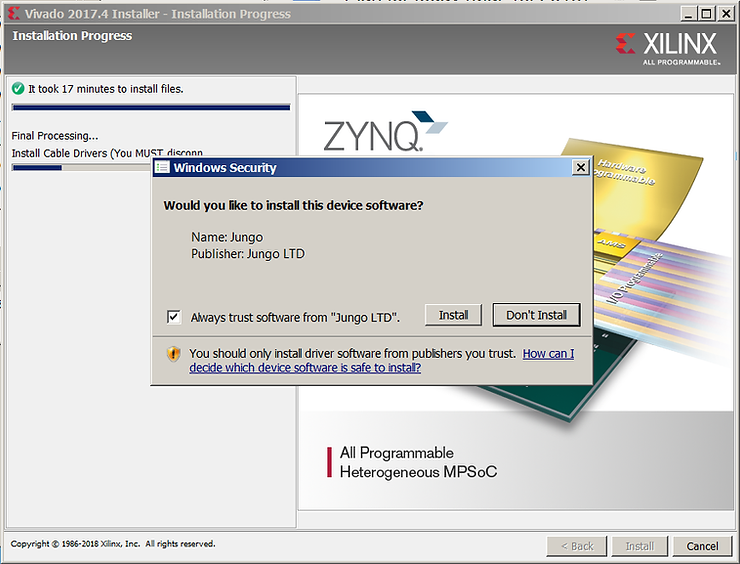
13. Click Always trust software from “Jungo LTD” and click Install.
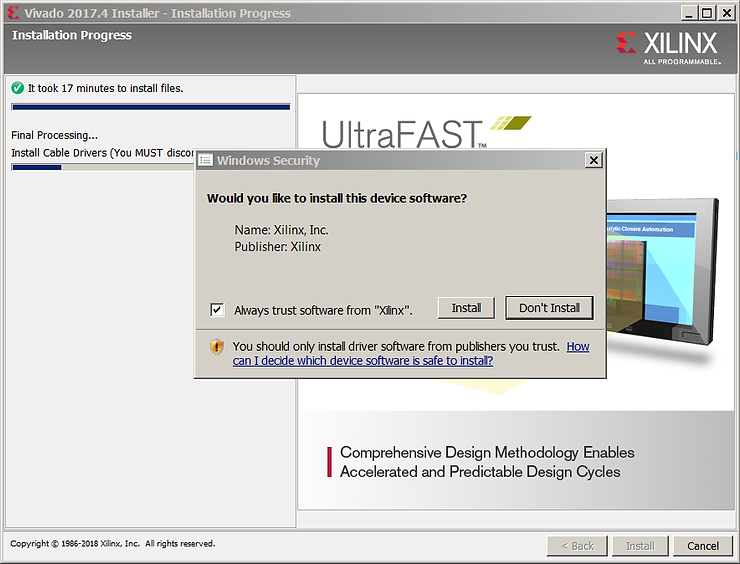
14. Click Always trust software from “Xilinx”. and click Install.
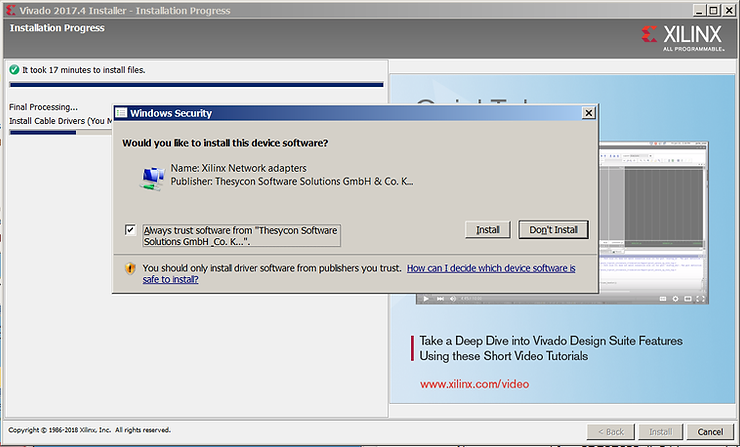
15. Click Always trust software from “Thesycon Software”. and click Install.
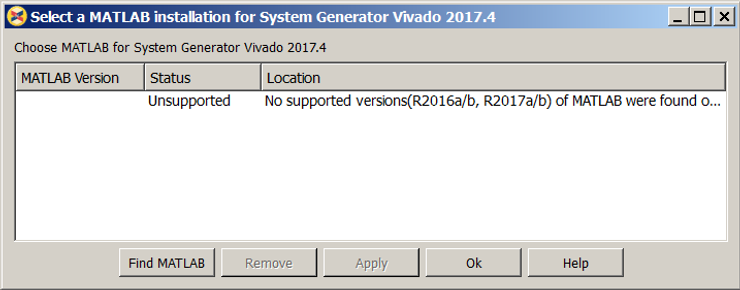
16. Ignore the MATLAB warning. Click Ok and Ok again.
If you miss any of these or accidentally select No (like I did when I accidentally clicked No on the Xilinx device software select Add Design Tools or Devices 2017.4 after installation completes.
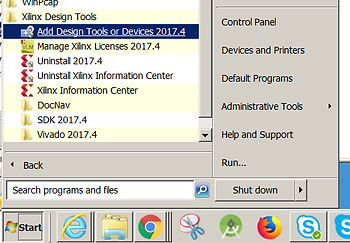
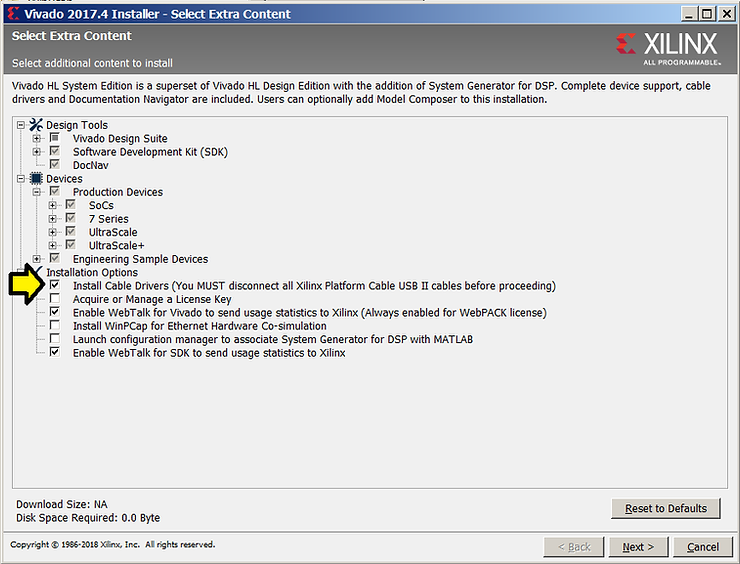
Select the Install Cable Drivers (You MUST disconnect all Xilinx Platform Cable USB II cables before proceeding) checkbox.
The click through to install the one you accidentally missed.
Licensing
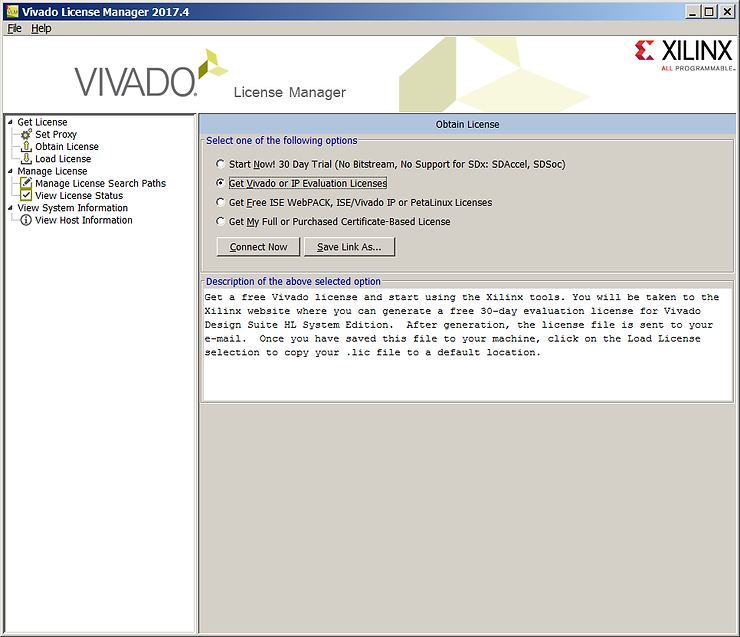
1. Click the Get Vivado or IP Evaluation Licenses radio button and click Connect Now.
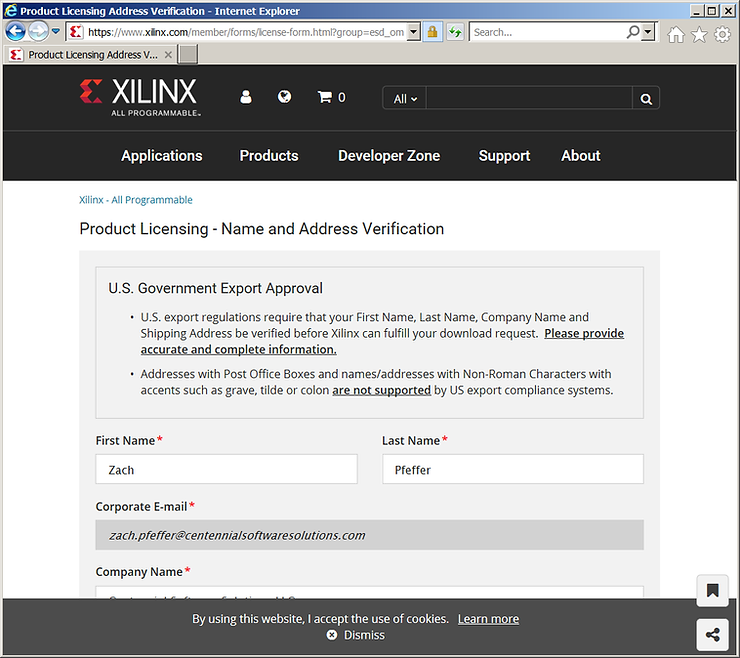
2. Accept the Name and Address Verification (again).
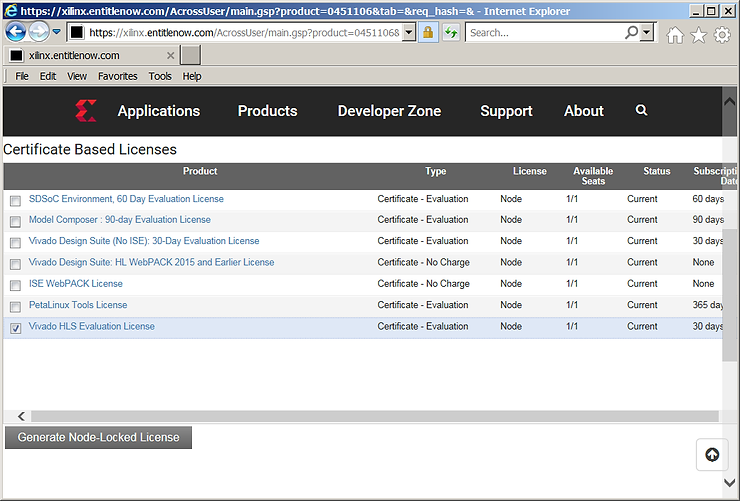
3. Select the Vivado HLS Evaluation License and click Generate Node Locked License.
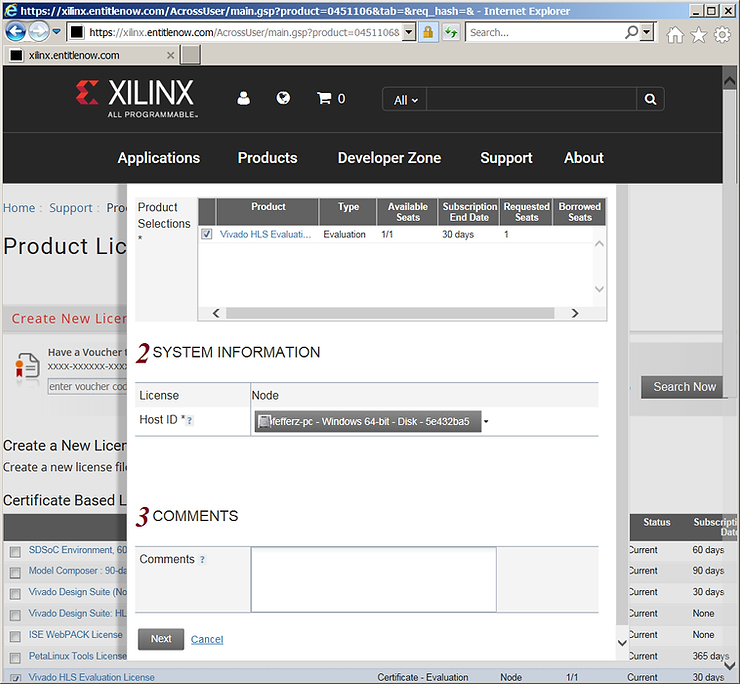
4. Select your Disk (since it likely won’t change in 30 days) and Click Next and Next again.
5. You’ll get something like this text:
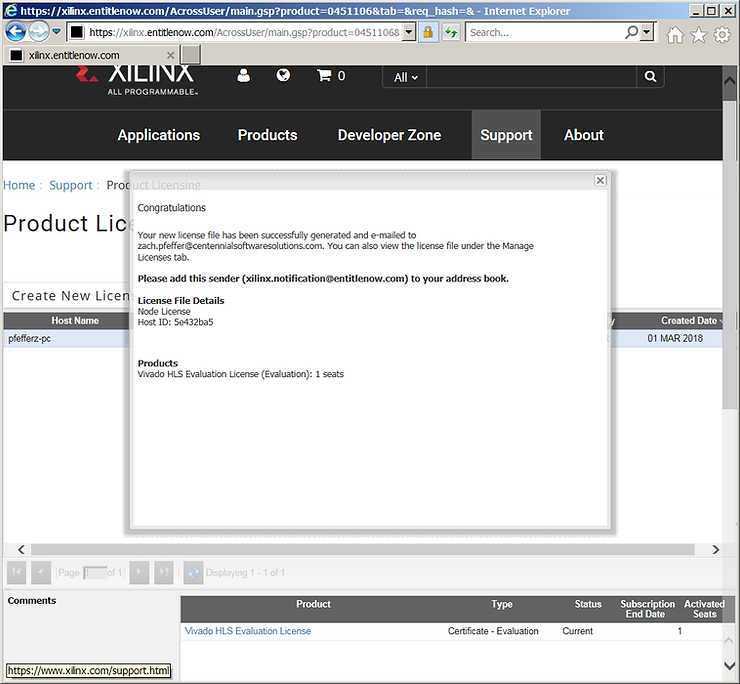
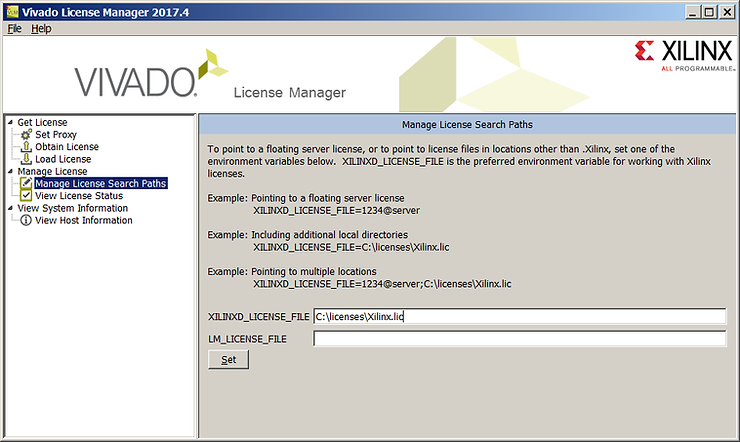
6. Check your email. The directions for Windows listed in the email appear wrong. Save the license to C:\licenses\Xilinx.lic. In the License Manager enter C:\licenses\Xilinx.lic into XILINXD_LICENSE_FILE and click Set.
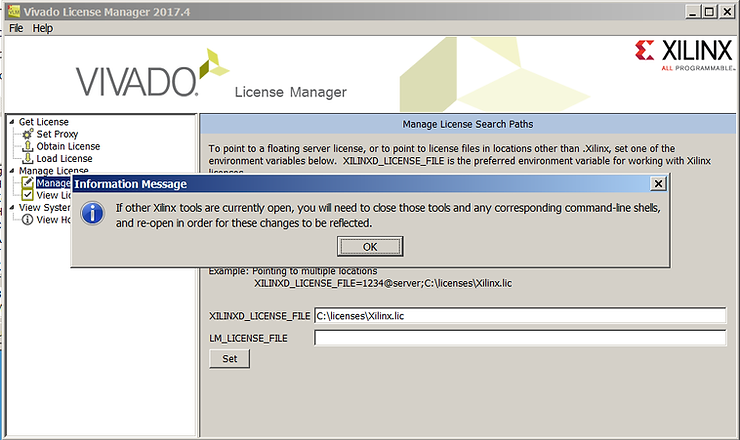
7. Close all Xilinx related programs (except the License Manager from Xilinx - a point missing from the Information Message) and click OK.
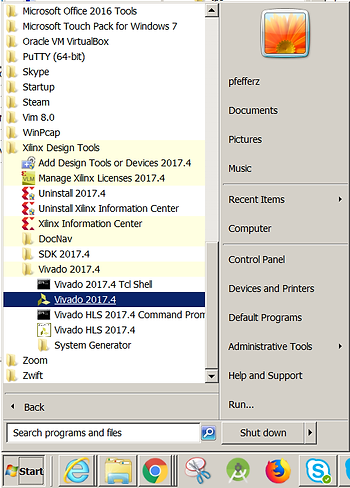
8. Now launch Vivado.
Notes
Specific machine specs listed at link.