
Install 2019.2 Vitis on Ubuntu 16.04.5
![]()
This post demonstrates an install of Vitis 2019.2 on Ubuntu 16.04.5.
Steps
#1 Go to
https://www.xilinx.com/support/download/index.html/content/xilinx/en/downloadNav/vitis/archive-vitis.html
#2 Download:
Xilinx Unified Installer 2019.2: Linux Self Extracting Web Installer (BIN - 115.4 MB) @ https://www.xilinx.com/member/forms/download/xef.html?filename=Xilinx_Unified_2019.2_1106_2127_Lin64.bin
MD5 SUM Value : b8d415a14a84241bdbae1f6a8a6e9a11
#3 Check install requirements:
https://www.xilinx.com/html_docs/xilinx2019_2/vitis_doc/aqm1532064088764.html
#4 Run:
cd /mnt/hgfs/shared
./Xilinx_Unified_2019.2_1106_2127_Lin64.bin
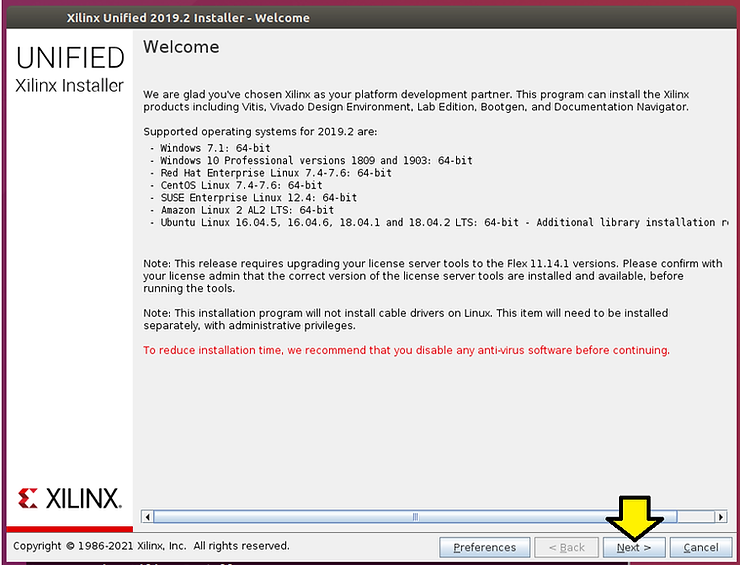
#5 Click Next > @
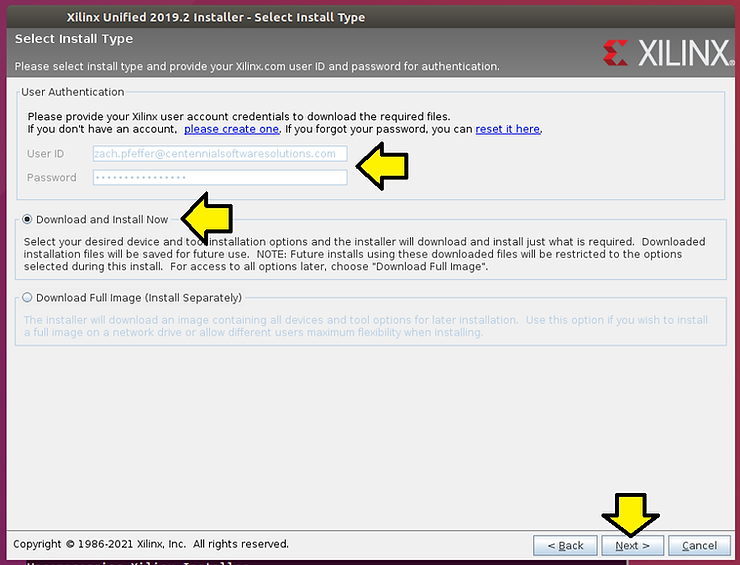
#6 Enter your Xilinx account, select Download and Install Now, and click Next > @
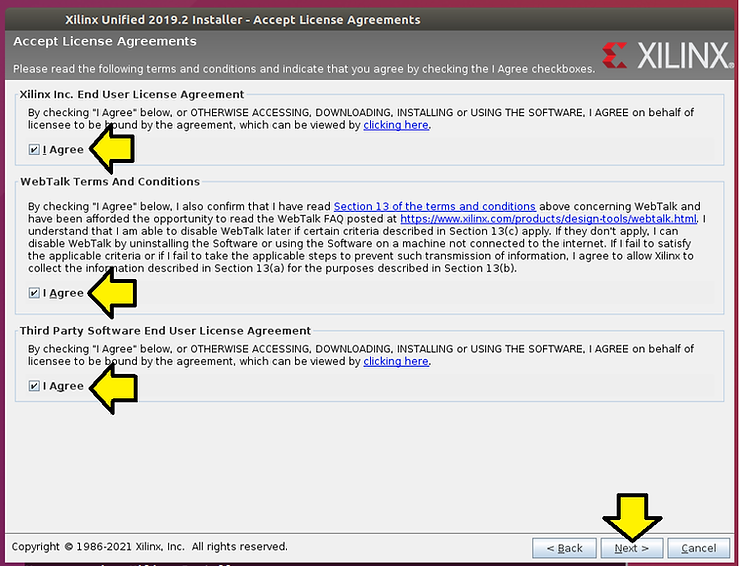
#7 Agree to each term and click Next > @
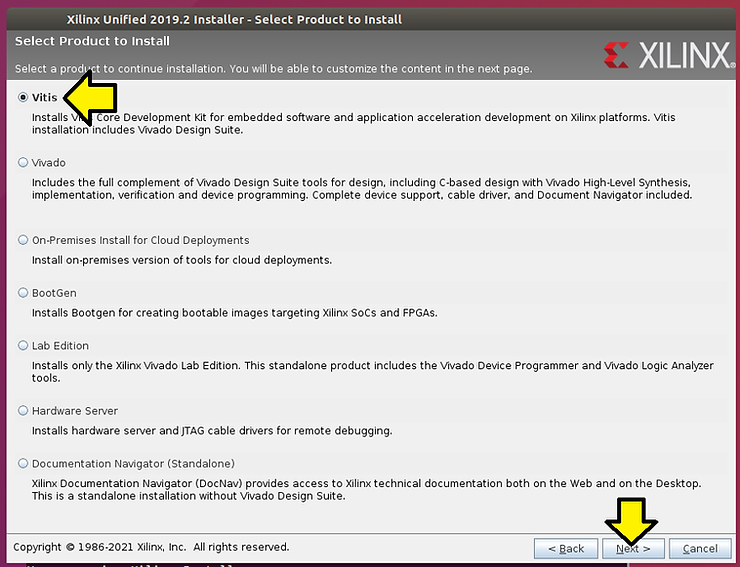
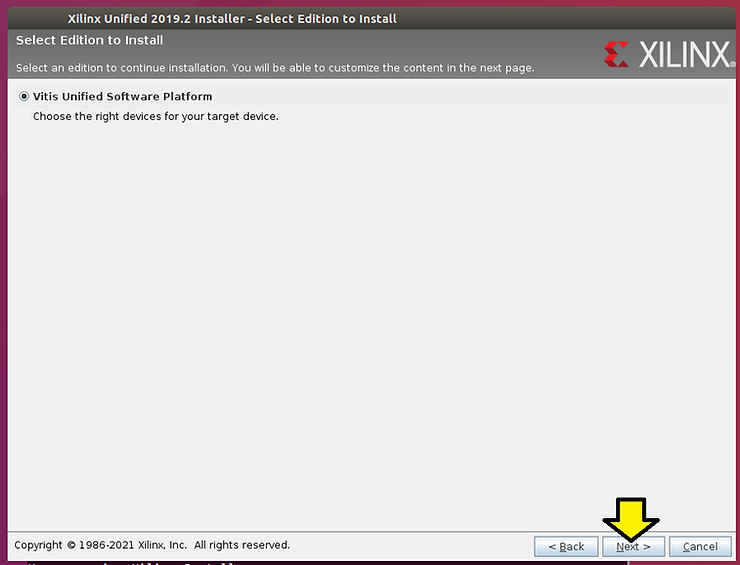
#8 Ensure you select Vitis and click Next > @
#9 Click Next > @
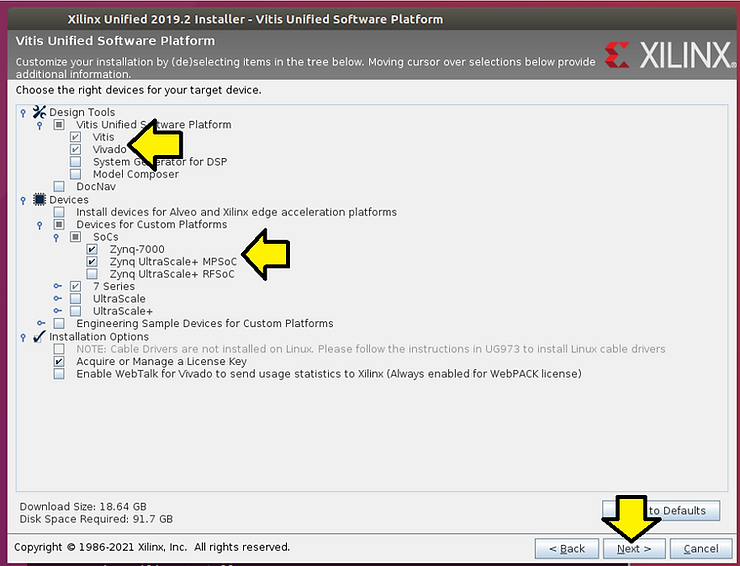
#10 For just doing Zynq-7000 and Zynq UltraScale+ MPSoC development select these options and click Next > @
#11 Install to /home/demo/xsdk and click Next >
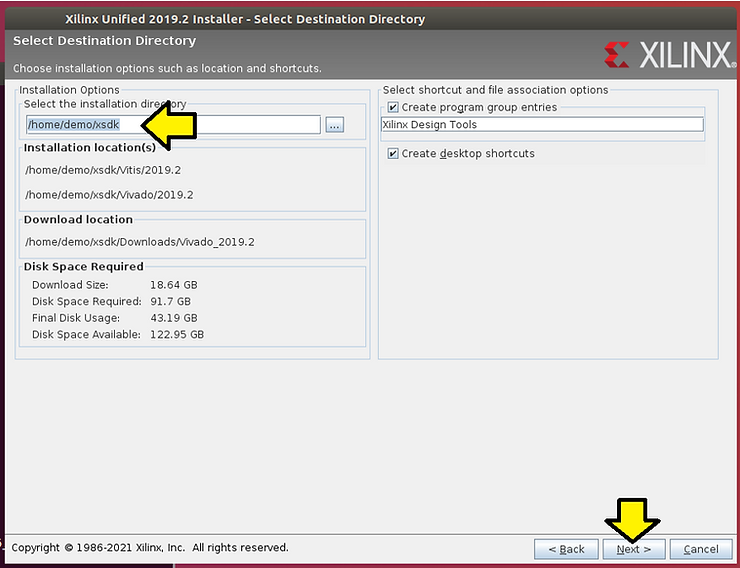
#12 In another terminal type df -h to ensure you have enough room
Example:
/dev/sda1 216G 93G 113G 46% /
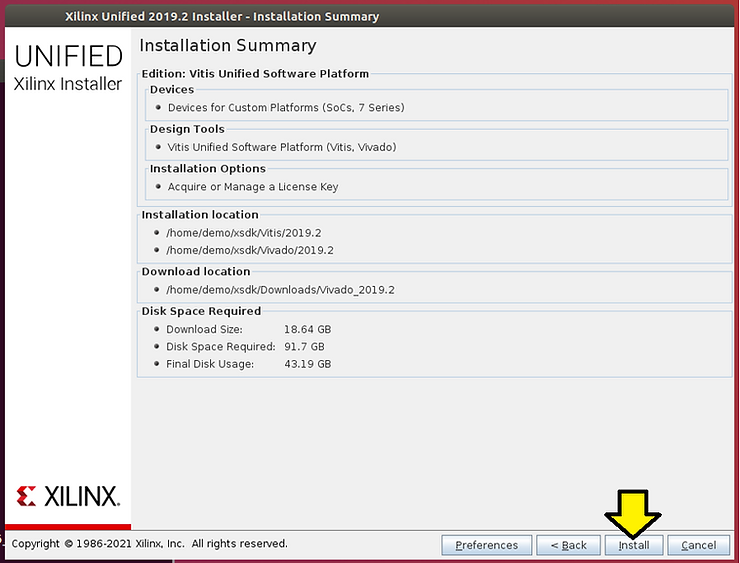
#13 Click Install @
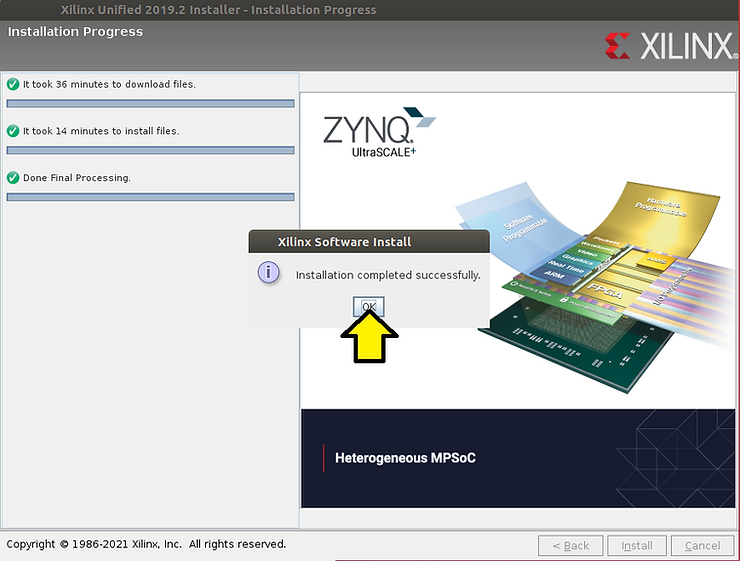
#14 Click OK
#15 Close the Vivado License Manager 2019.1 by clicking File > Exit

References
Vitis 2019.2 Docs @ https://www.xilinx.com/support/documentation-navigation/design-hubs/2019-2/dh0089-vitis-embedded.html
Xilinx logo clipped from xilinx.com