
Install Ubuntu 22.04.1 in VMware and Launch the Vivado 2023.1 Installer
![]()
This post shows you how to install Ubuntu 22.04.1 in VMware and launch the Vivado 2023.1 installer inside it.
Check which OS Vivado Supports
# Find Vivado ML Edition 2023.1 (aka Vivado) @
amd.com > Downloads & Support > Vivado ML Developer Tools
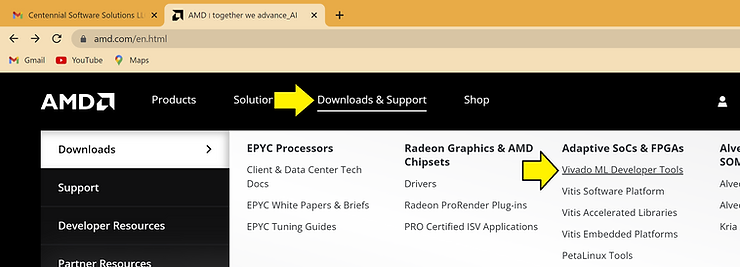
# Click Release Notes (https://docs.xilinx.com/r/en-US/ug973-vivado-release-notes-install-license/Supported-Operating-Systems ) to check supported operating systems:
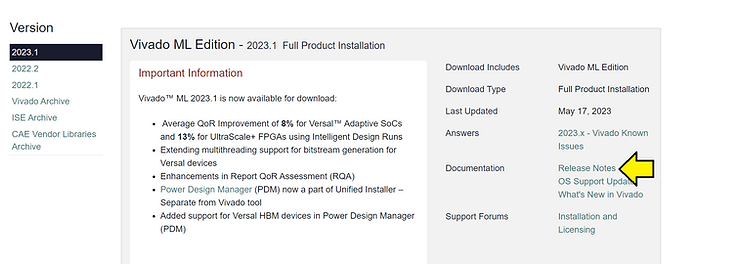
Here’s a copy of the operating systems supported for Vivado 2023.1 (Vivado ML Edition 2023.1):
-
Microsoft Windows Professional/Enterprise 10.0 20H2 Update; 10.0 21H1 Update; 10.0 21H2 Update; 10.0 22H2 Update
-
Microsoft Windows 11.0 21H2 Update; 11.0 22H2 Update
-
Red Hat Enterprise Workstation/Server 7.4, 7.5, 7.6, 7.7, 7.9, 8.3, 8.4, 8.5, 8.6, 8.7, 9.0 and 9.1 (64-bit), English/Japanese
-
CentOS 7.4, 7.5, 7.6, 7.7, and 7.9 (64-bit), English/Japanese
-
SUSE Linux Enterprise 12 SP4 and 15 SP2 (64-bit), English/Japanese
-
Amazon Linux 2 AL2 LTS (64-bit)
-
Ubuntu Linux 18.04.1 LTS; 18.04.2 LTS, 18.04.3 LTS; 18.04.4 LTS; 18.04.5 LTS; 18.04.6 LTS; and 20.04 LTS, 20.04.1 LTS, 20.04.2 LTS, 20.04.3 LTS, 20.04.4 LTS; 20.04.5 LTS; 22.04 LTS and 22.04.1 LTS (64-bit), English/Japanese
Get the Installer
# Click on the following: (you can create an account from the link if you don’t have one):
AMD Unified Installer for FPGAs & Adaptive SoCs 2023.1: Linux Self Extracting Web Installer (BIN - 265.94 MB)
MD5 SUM Value : e47ad71388b27a6e2339ee82c3c8765f
Download to “D:\Installers\Xilinx\2023.1\Xilinx_Unified_2023.1_0507_1903_Lin64.bin”
# Check the MD5SUM in PowerShell using Get-FileHash
Get-FileHash "D:\Installers\Xilinx\2023.1\Xilinx_Unified_2023.1_0507_1903_Lin64.bin" -Algorithm MD5
Result (matches):
Algorithm       Hash                                                                   Path
---------       ----                                                                   ----
MD5             E47AD71388B27A6E2339EE82C3C8765F                                       D:\Installers\Xilinx\2023.1\Xilinx_Unified_2023.1_0507_1903_Lin64.bin
Get the Ubuntu ISO
# Download the 3.6G Ubuntu 22.04.1 LTS ISO @ https://old-releases.ubuntu.com/releases/22.04.1/ubuntu-22.04.1-desktop-amd64.iso ( from https://old-releases.ubuntu.com/releases/22.04.1/ ) to “D:\isos\Ubuntu\22.04.01\ubuntu-22.04.1-desktop-amd64.iso”
Note:
Here are what the other files are:
.iso - this file
.iso.torrent - for BitTorrents ( https://ubuntu.com/download/alternative-downloads )
.iso.zsync - save bandwidth and time downloading ( https://help.ubuntu.com/community/ZsyncCdImage )
.list - a listing of the files in the iso
.manifest - a list of the packages and package versions included in the .iso
# Check the SHA256SUM in PowerShell using Get-FileHash
https://old-releases.ubuntu.com/releases/22.04.1/SHA256SUMS
c396e956a9f52c418397867d1ea5c0cf1a99a49dcf648b086d2fb762330cc88d *ubuntu-22.04.1-desktop-amd64.iso
Get-FileHash "D:\isos\Ubuntu\22.04.01\ubuntu-22.04.1-desktop-amd64.iso" -Algorithm SHA256
Result (matches):
Algorithm       Hash                                                                   Path
---------       ----                                                                   ----
SHA256          C396E956A9F52C418397867D1EA5C0CF1A99A49DCF648B086D2FB762330CC88D       D:\isos\Ubuntu\22.04.01\ubuntu-22.04.1-desktop-amd64.iso
Check Computer Configuration
# Search Information and Open System Information
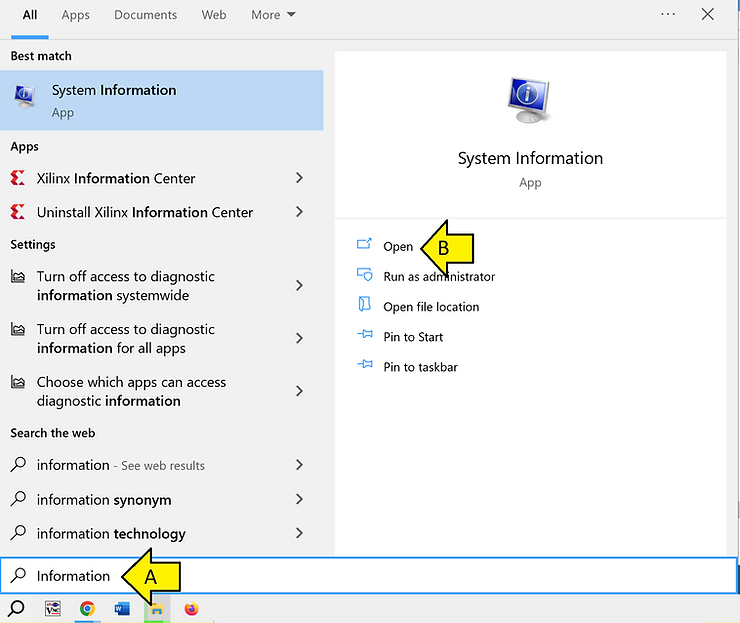
# Check processors:
Processor Intel(R) Core(TM) i9-8950HK CPU @ 2.90GHz, 2904 Mhz, 6 Core(s), 12 Logical Processor(s)
# Check memory:
Installed Physical Memory (RAM) 96.0 GB
Total Physical Memory 95.7 GB
Available Physical Memory 80.8 GB
# Launch VMware Workstation 16 Pro (Help > About VMware Workstation: 16.2.4 build-20089737)
# Click Home > Create a New Virtual Machine
# Select Typical, click Next >
# Select Installer disc image (iso), use D:\isos\Ubuntu\22.04.01\ubuntu-22.04.1-desktop-amd64.iso (will use Easy Install - just need a Full name, username, password); click Next >
# Set Full name, User name, Password
# Set the Virtual machine name:
vmwaredisk-20230708-vivado_22.04.1-on-ubuntu_22.04.01
# Set the Location:
C:\Users\Zach Pfeffer\Documents\Virtual Machines\vmwaredisk-20230708-vivado_22.04.1-on-ubuntu_22.04.01
# Set Maximum disk size (GB): 400 (300 is not big enough); select Store virtual disk as a single file; click Next >
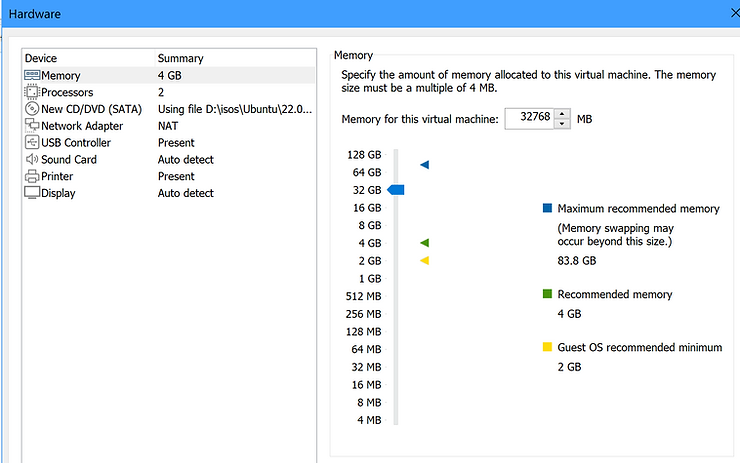
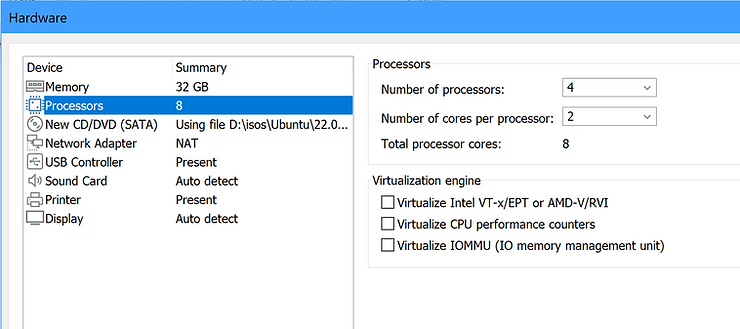
# Click Customize Hardware
# Set memory to 32 GB
# Set the Number of processors to 4
# Set the Number of cores per processor to 2
# Set USB compatibility to USB 3.1
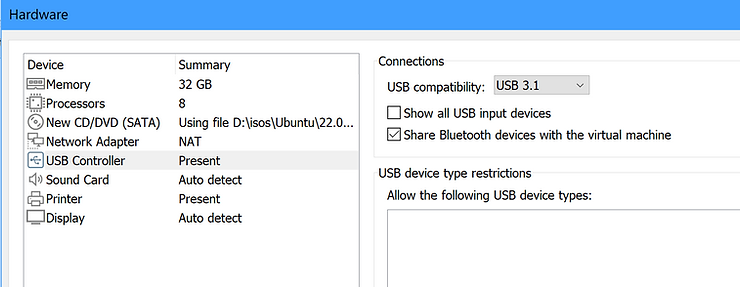
# Click Close
# Click Finish
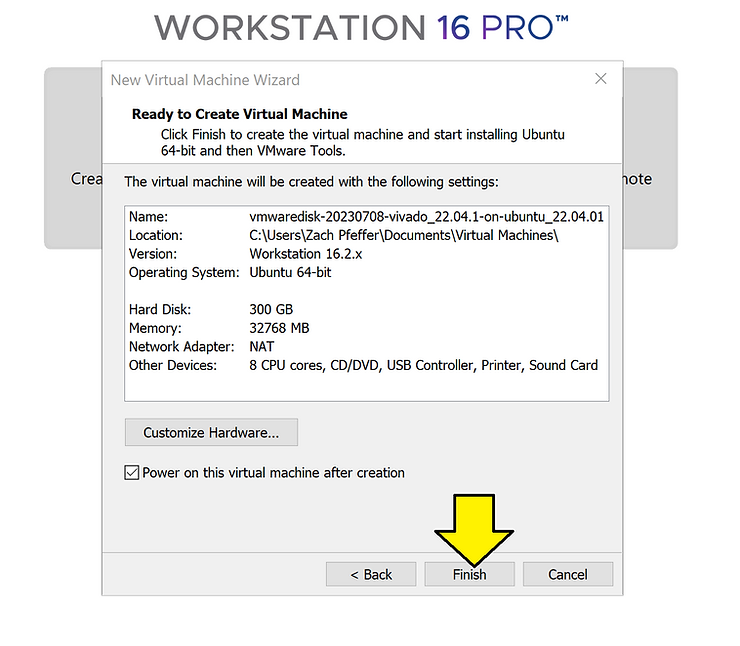
The virtual machine will launch
Configure Ubuntu
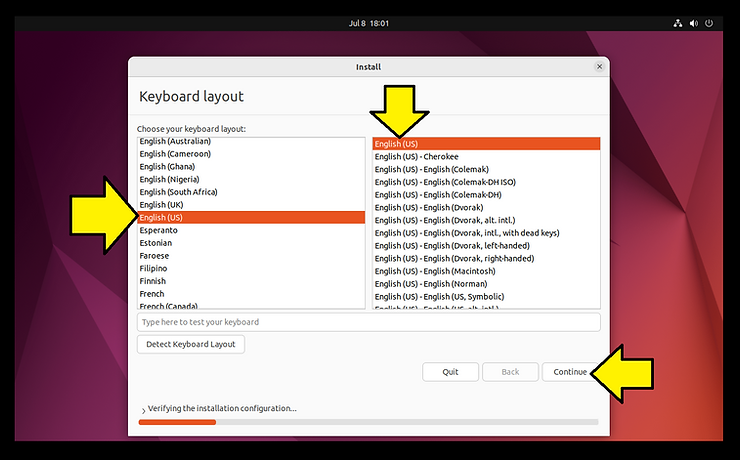
# Select Keyboard layout and click Continue
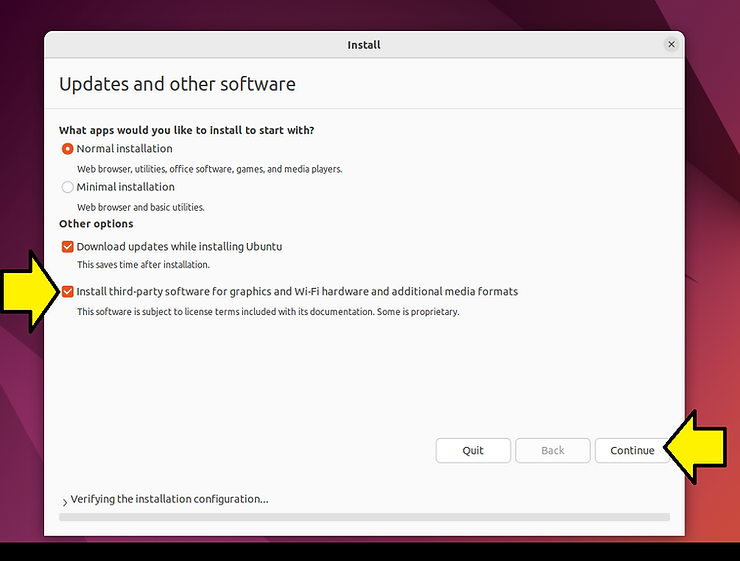
# Leave Normal installation and Download updates while installing Ubuntu selected; select Install third-party software for graphics and Wi-Fi hardware and additional media formats; click Continue
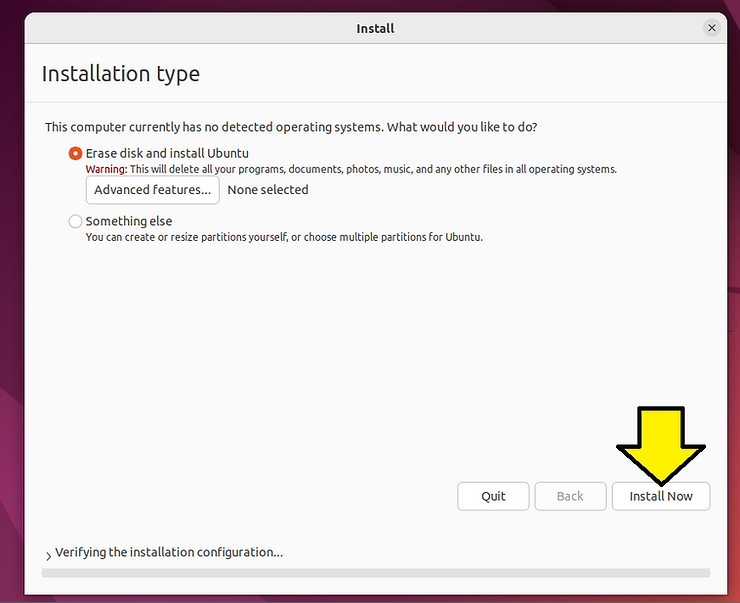
# Leave Erase disk and install Ubuntu selected and click Install Now
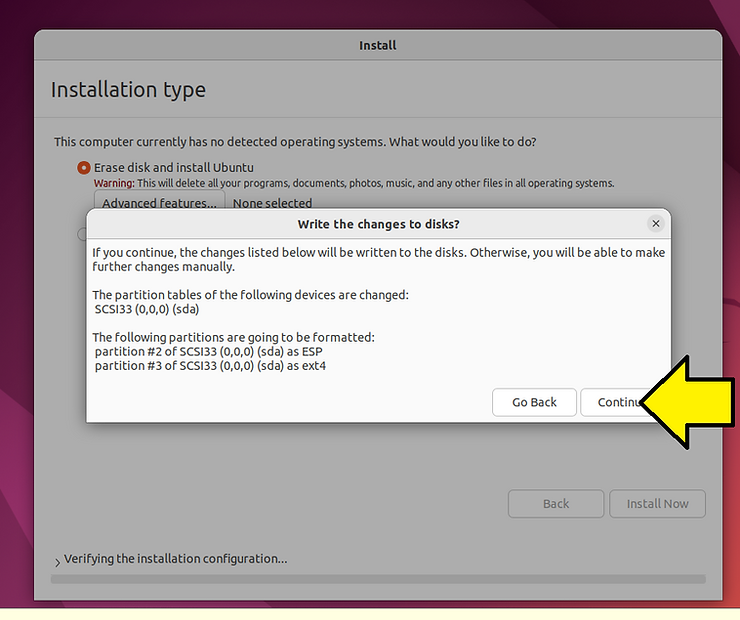
# Click Continue on the Write the changes to disks? pop-up
# List location (Denver)
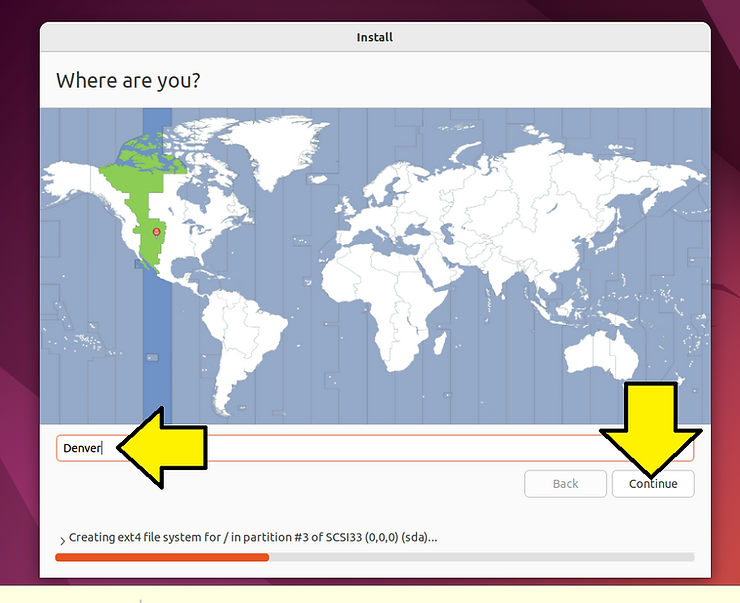
# Enter
Your name: Demo User
Your computer’s name: fpgadev
Pick a username: demouser
Password
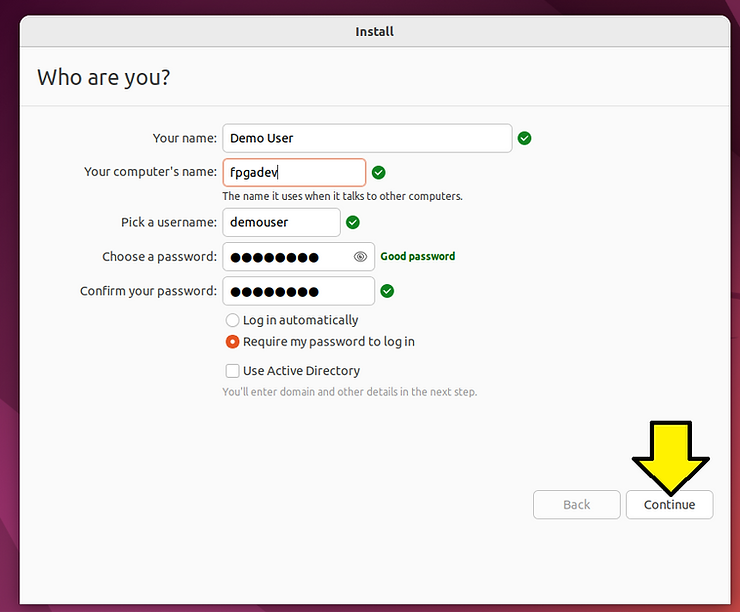
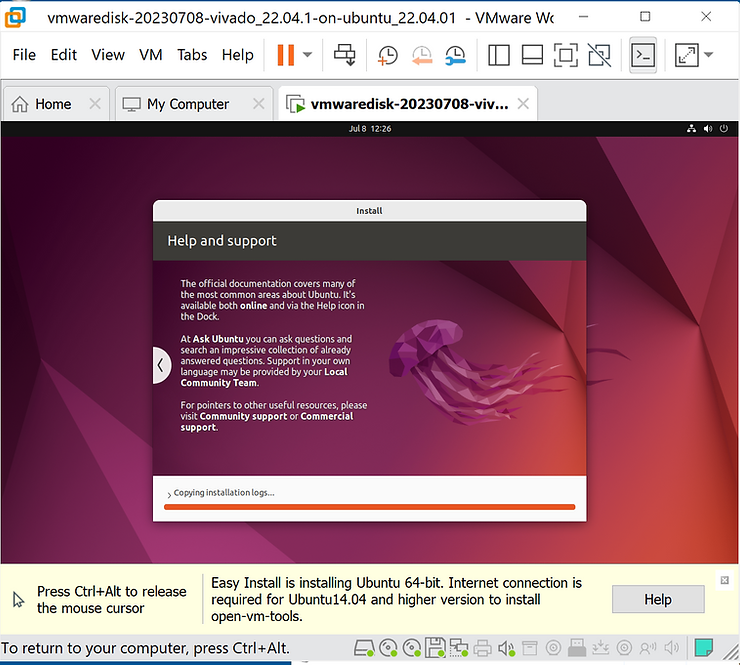
You’ll see:
# Click Restart Now
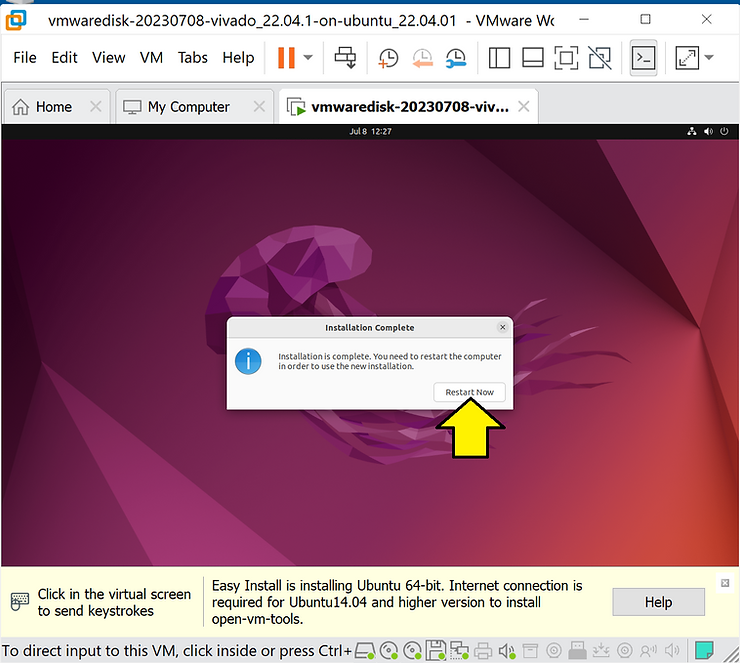
Note: open-vm-tools will have been installed
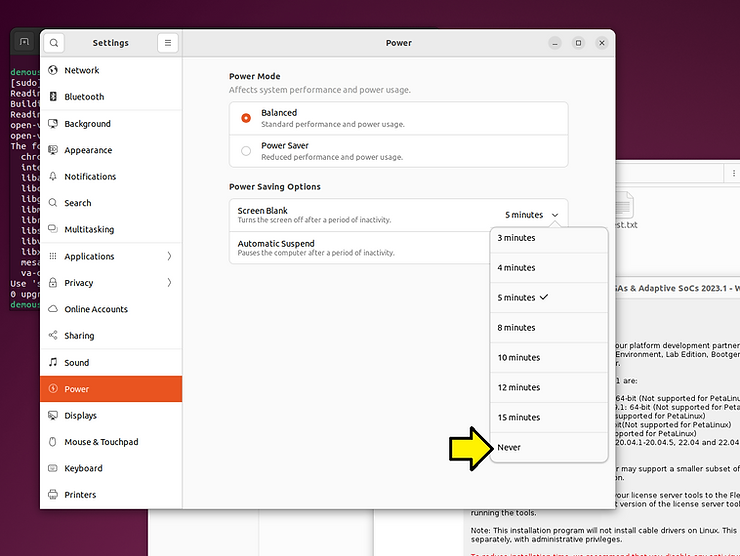
Optional: Run Settings and Disable Automatic Suspend
# Click Power > Automatic Suspend > Never
Share the Folder You Downloaded the Installer To
These instructions will allow you to access Installers at /mnt/hgfs/Installers
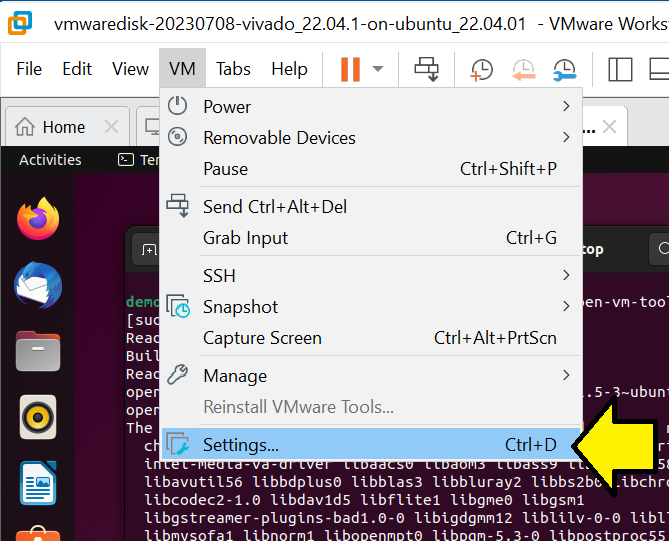
# Click VM > Settings…
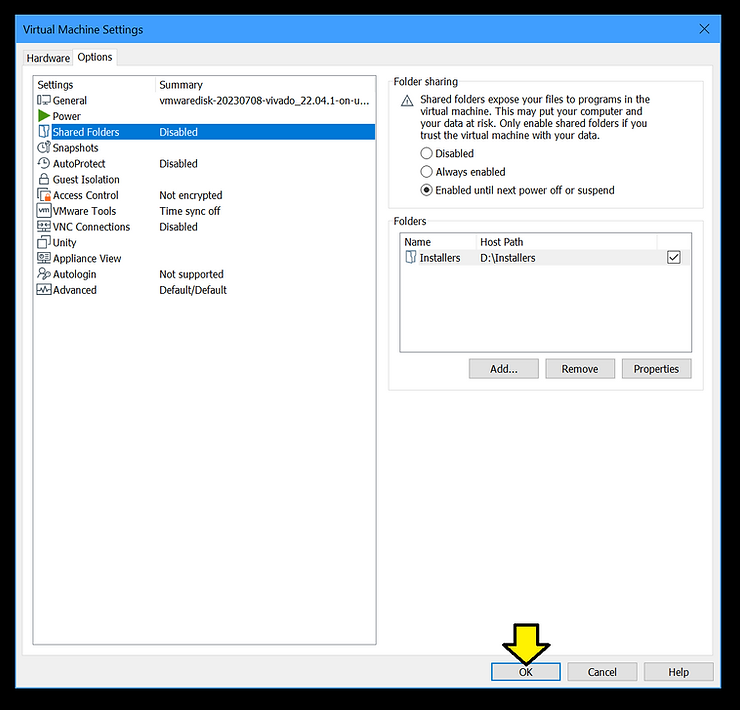
Click Options, Shared Folders, Enabled until next power off or suspend, Add…

# Click Browse and find the Installers path
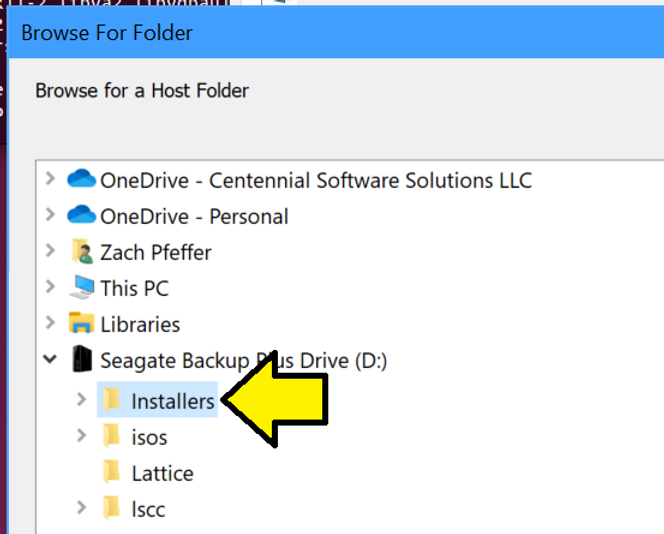
# Click Next
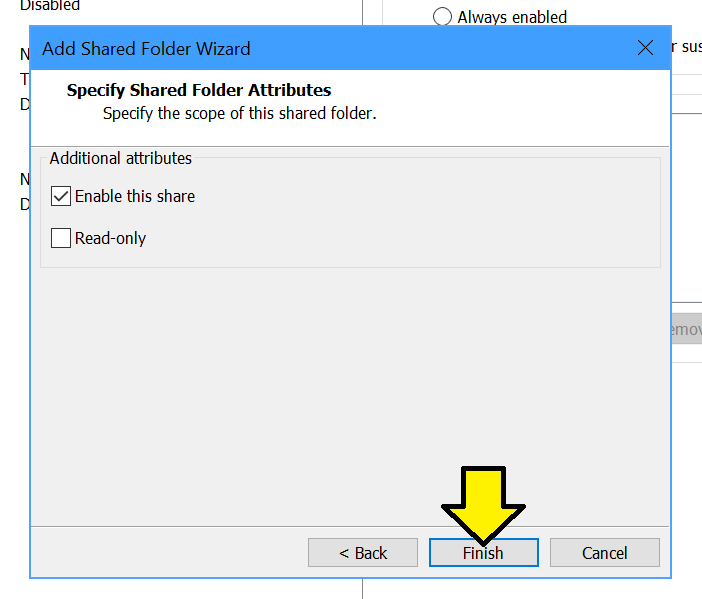
# Click Finish
# Click OK
# Test: open a terminal in Ubuntu and run:
ls /mnt/hgfs/Installers
…and
cd /mnt/hgfs/Installers
touch test.txt
# Check test.txt exists
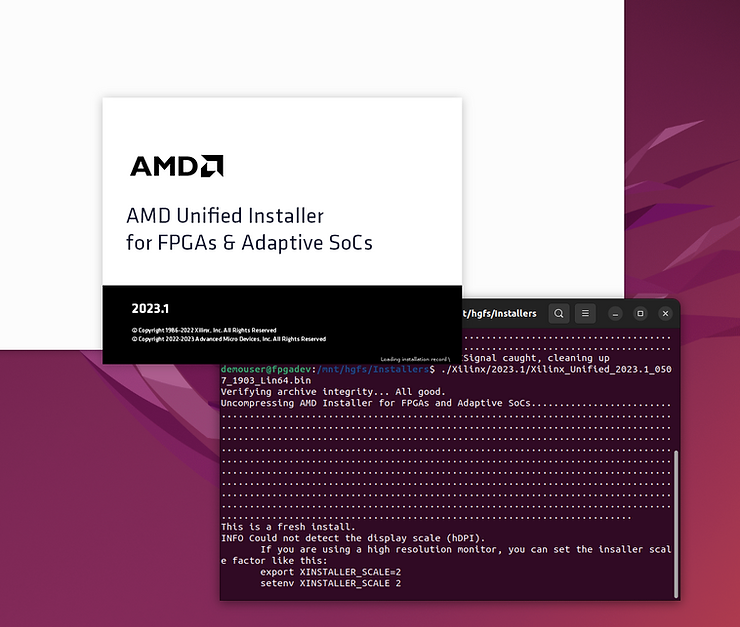
Launch the Installer
# Open a terminal and run
cd /mnt/hgfs/Installers
chmod +x Xilinx/2023.1/Xilinx_Unified_2023.1_0507_1903_Lin64.bin
./Xilinx/2023.1/Xilinx_Unified_2023.1_0507_1903_Lin64.bin
You should see:
This post described how to Install Ubuntu 22.04.1 in VMware and launch the Vivado Installer
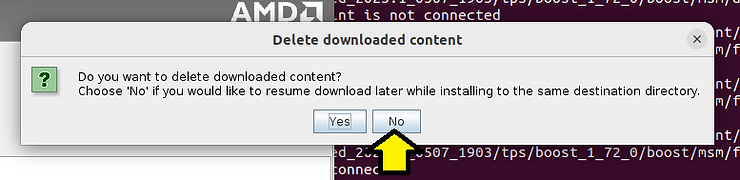
Recover From An Out of Space Error
You’ll need the sudo password for this.
# If you run out of space during the subsequent install, click Cancel

# Click No
#Power off the VM
# Double-click the Hard Disk (SCSI)
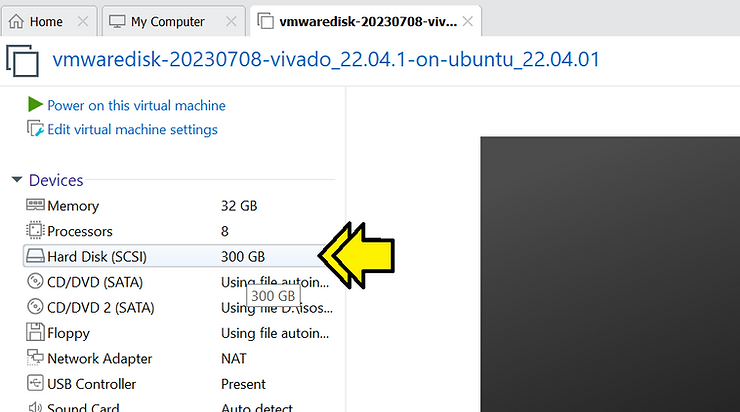
# Click Expand
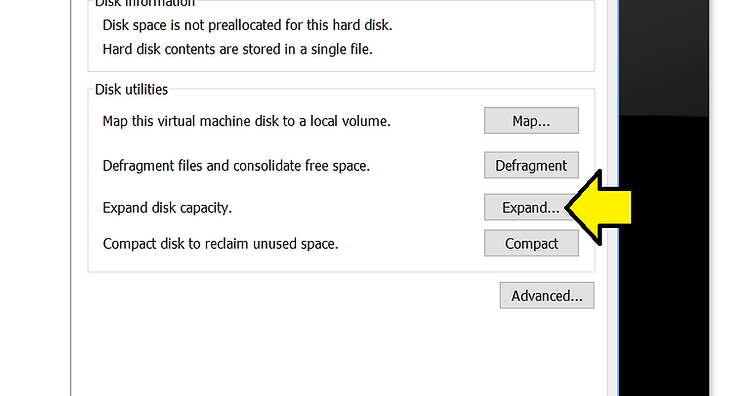
# Set the Maximum disk size (GB) to 400 and click Expand
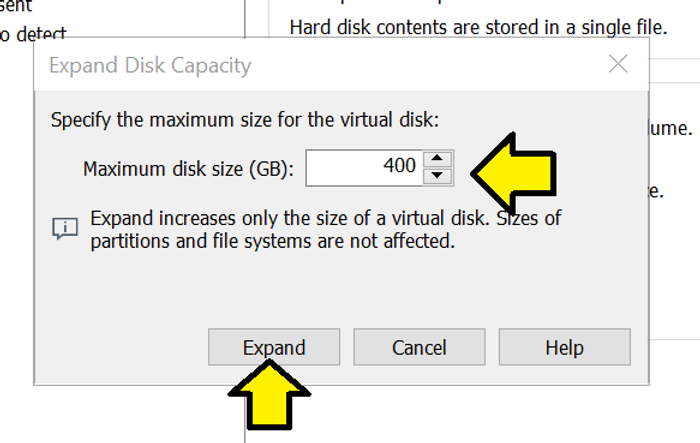
You’ll see:
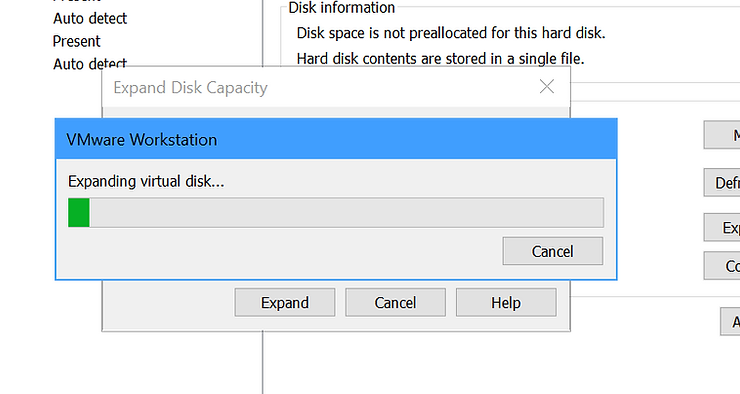
It will take some time to complete the expansion.
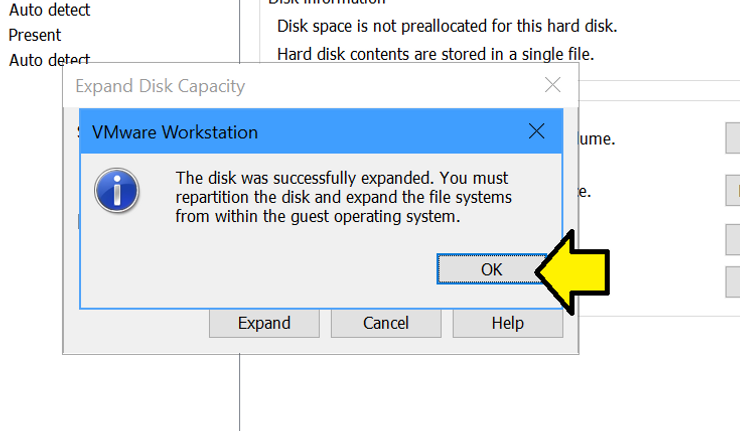
# Once it completes, click OK:
# Close the hardware configuration and power on the VM
# In Ubuntu, click Show Applications, search Disk, click on Disks

# Click on the disk, click the partition, click the gear and click Resize
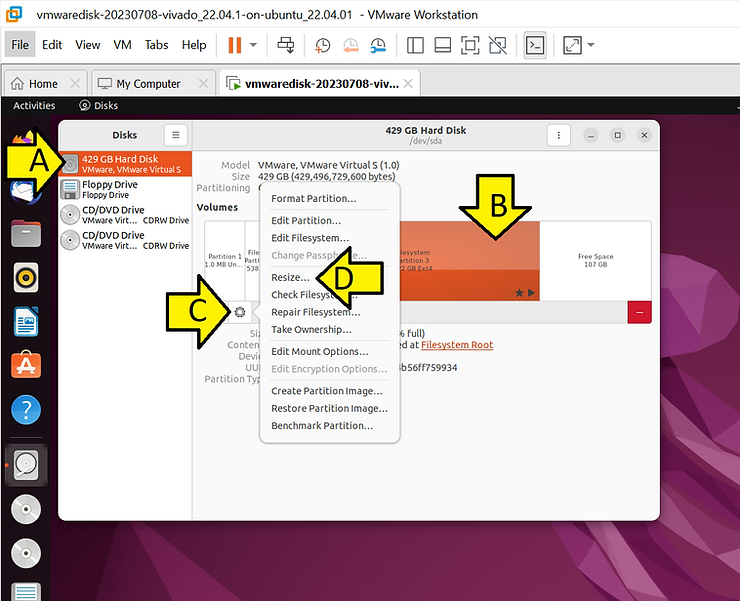
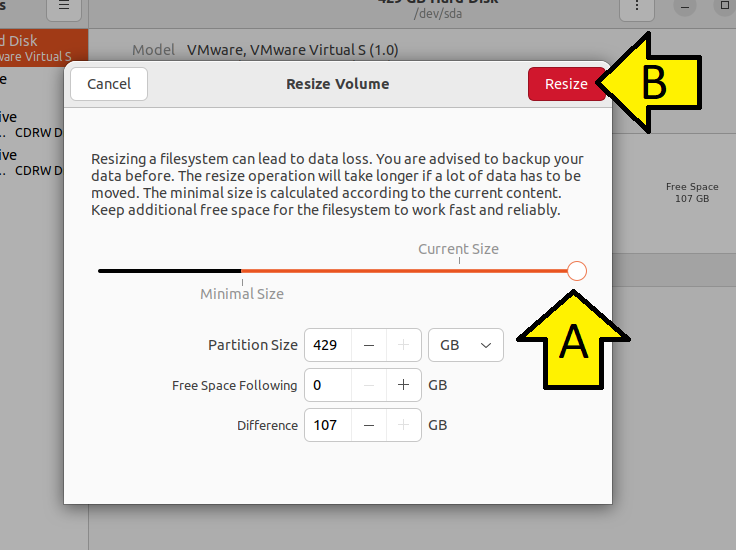
# Drag the cursor to increase the size and click Resize
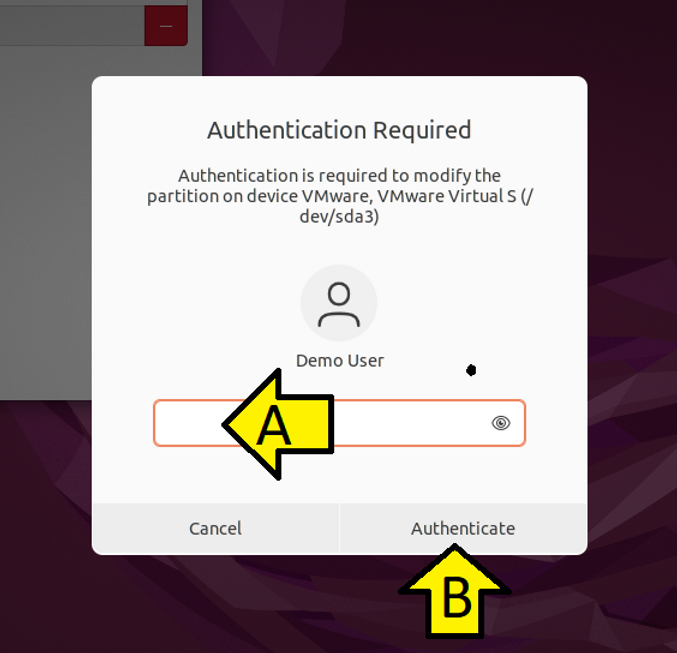
# Enter the sudo password and click Authenticate
# Launch the installer again
cd /mnt/hgfs/Installers
chmod +x Xilinx/2023.1/Xilinx_Unified_2023.1_0507_1903_Lin64.bin
./Xilinx/2023.1/Xilinx_Unified_2023.1_0507_1903_Lin64.bin
References
Enable a Shared Folder for a Virtual Machine
https://docs.vmware.com/en/VMware-Workstation-Pro/16.0/com.vmware.ws.using.doc/GUID-D6D9A5FD-7F5F-4C95-AFAB-EDE9335F5562.html
Disk Resize on Ubuntu
https://help.ubuntu.com/stable/ubuntu-help/disk-resize.html.en
Logo
https://library.amd.com/media/?mediaId=84C3498C-1B51-4965-93729CC284CD2DC2